Add a Channel to a Project
There are two methods for adding a channel to a project:
Method 1: Adding a Channel from the Accounts Dashboard
- In your account dashboard, locate the name of your active project.
- Click on the project name to access the dropdown menu.
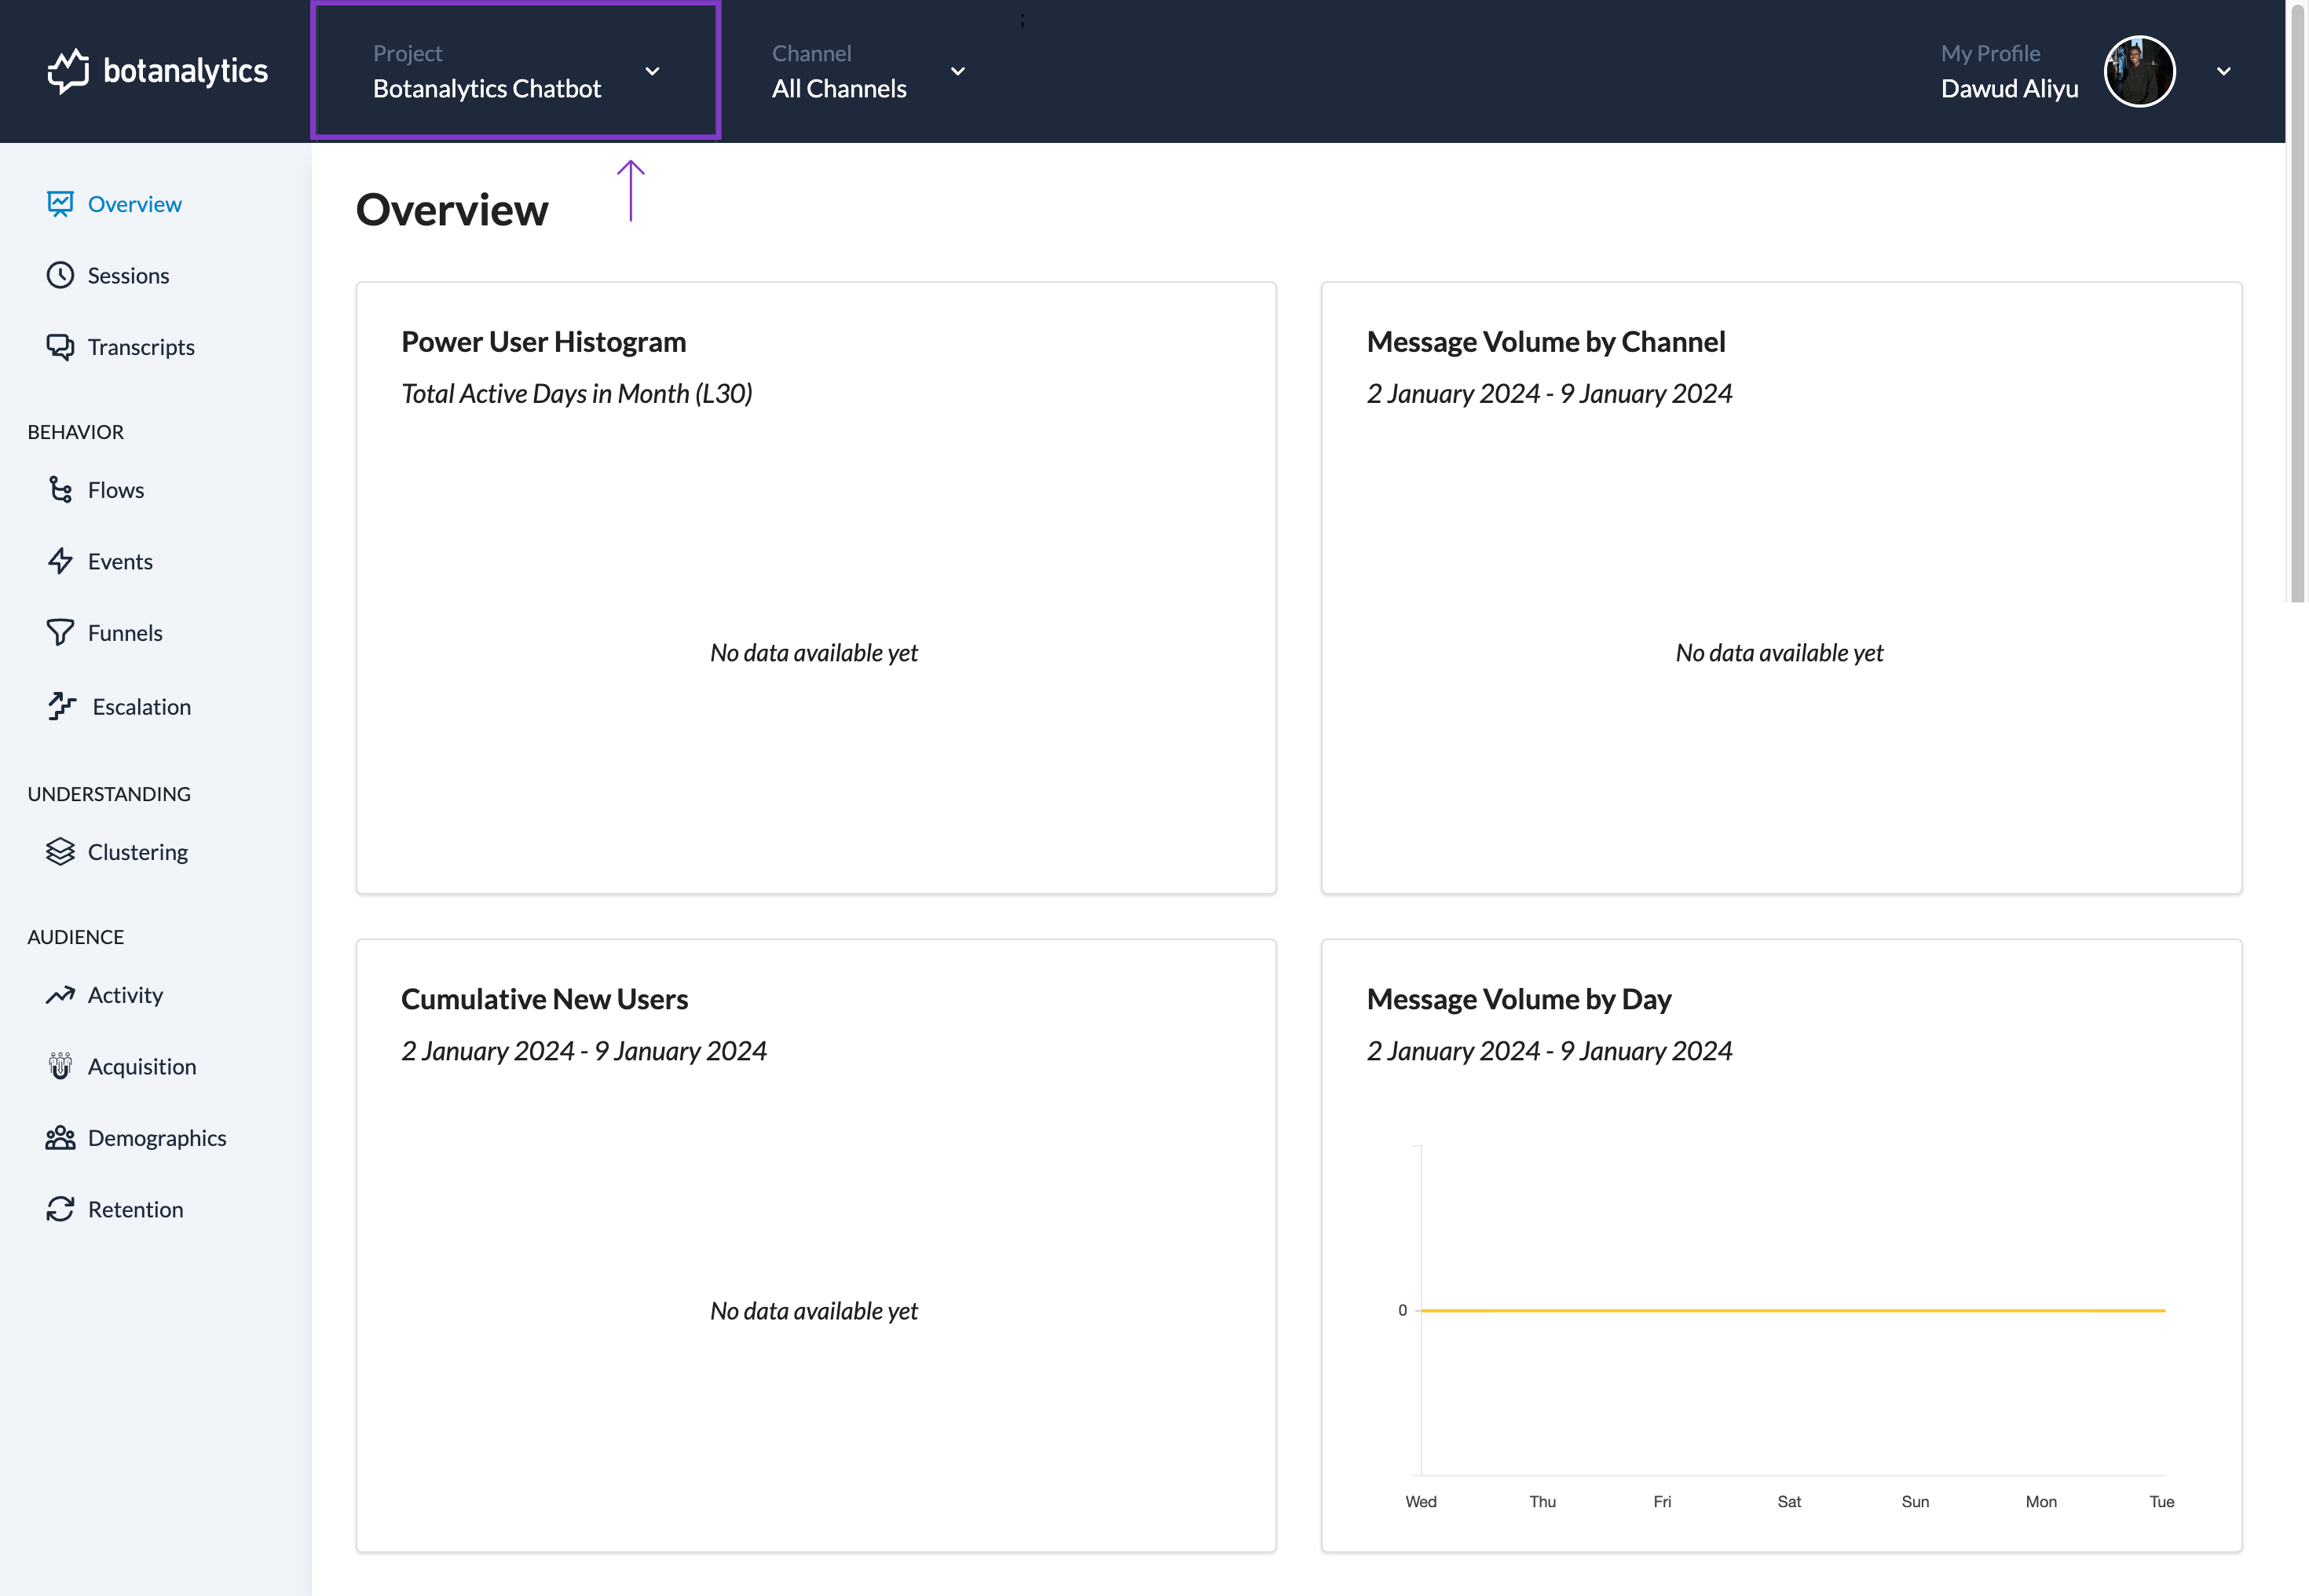
Access Project Settings
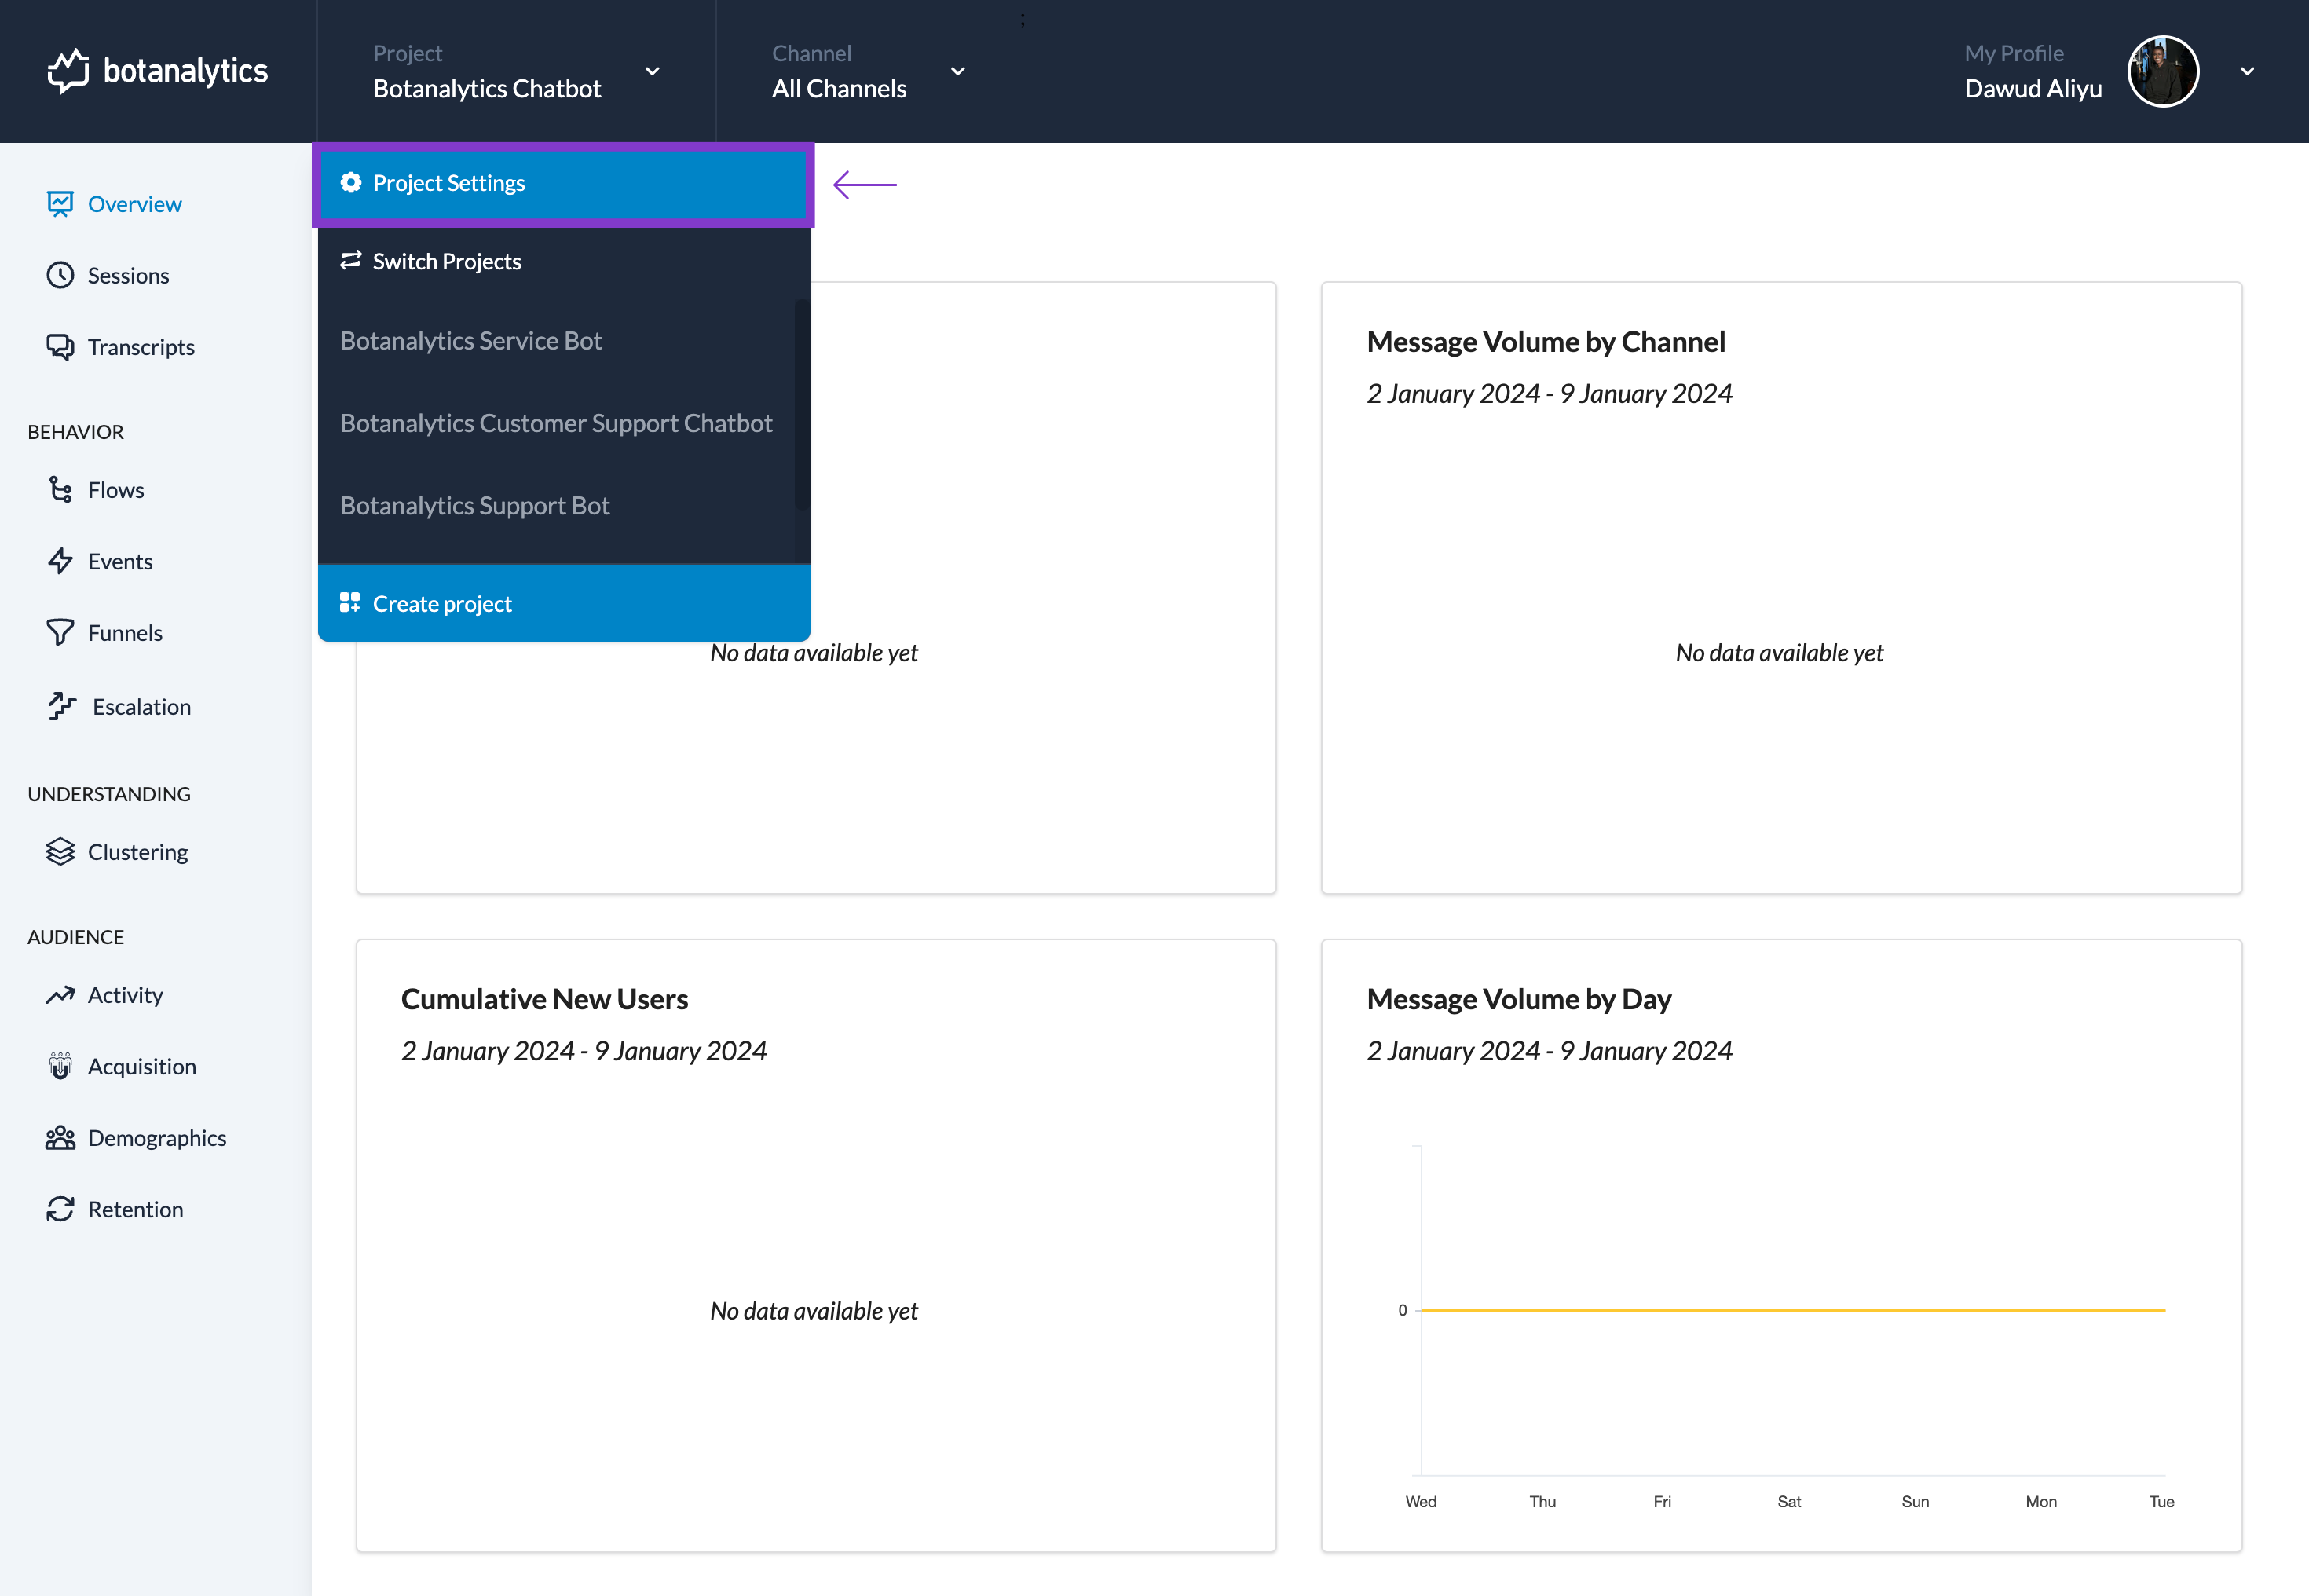
- On the dropdown menu, click on Project settings to take you to the project settings page.
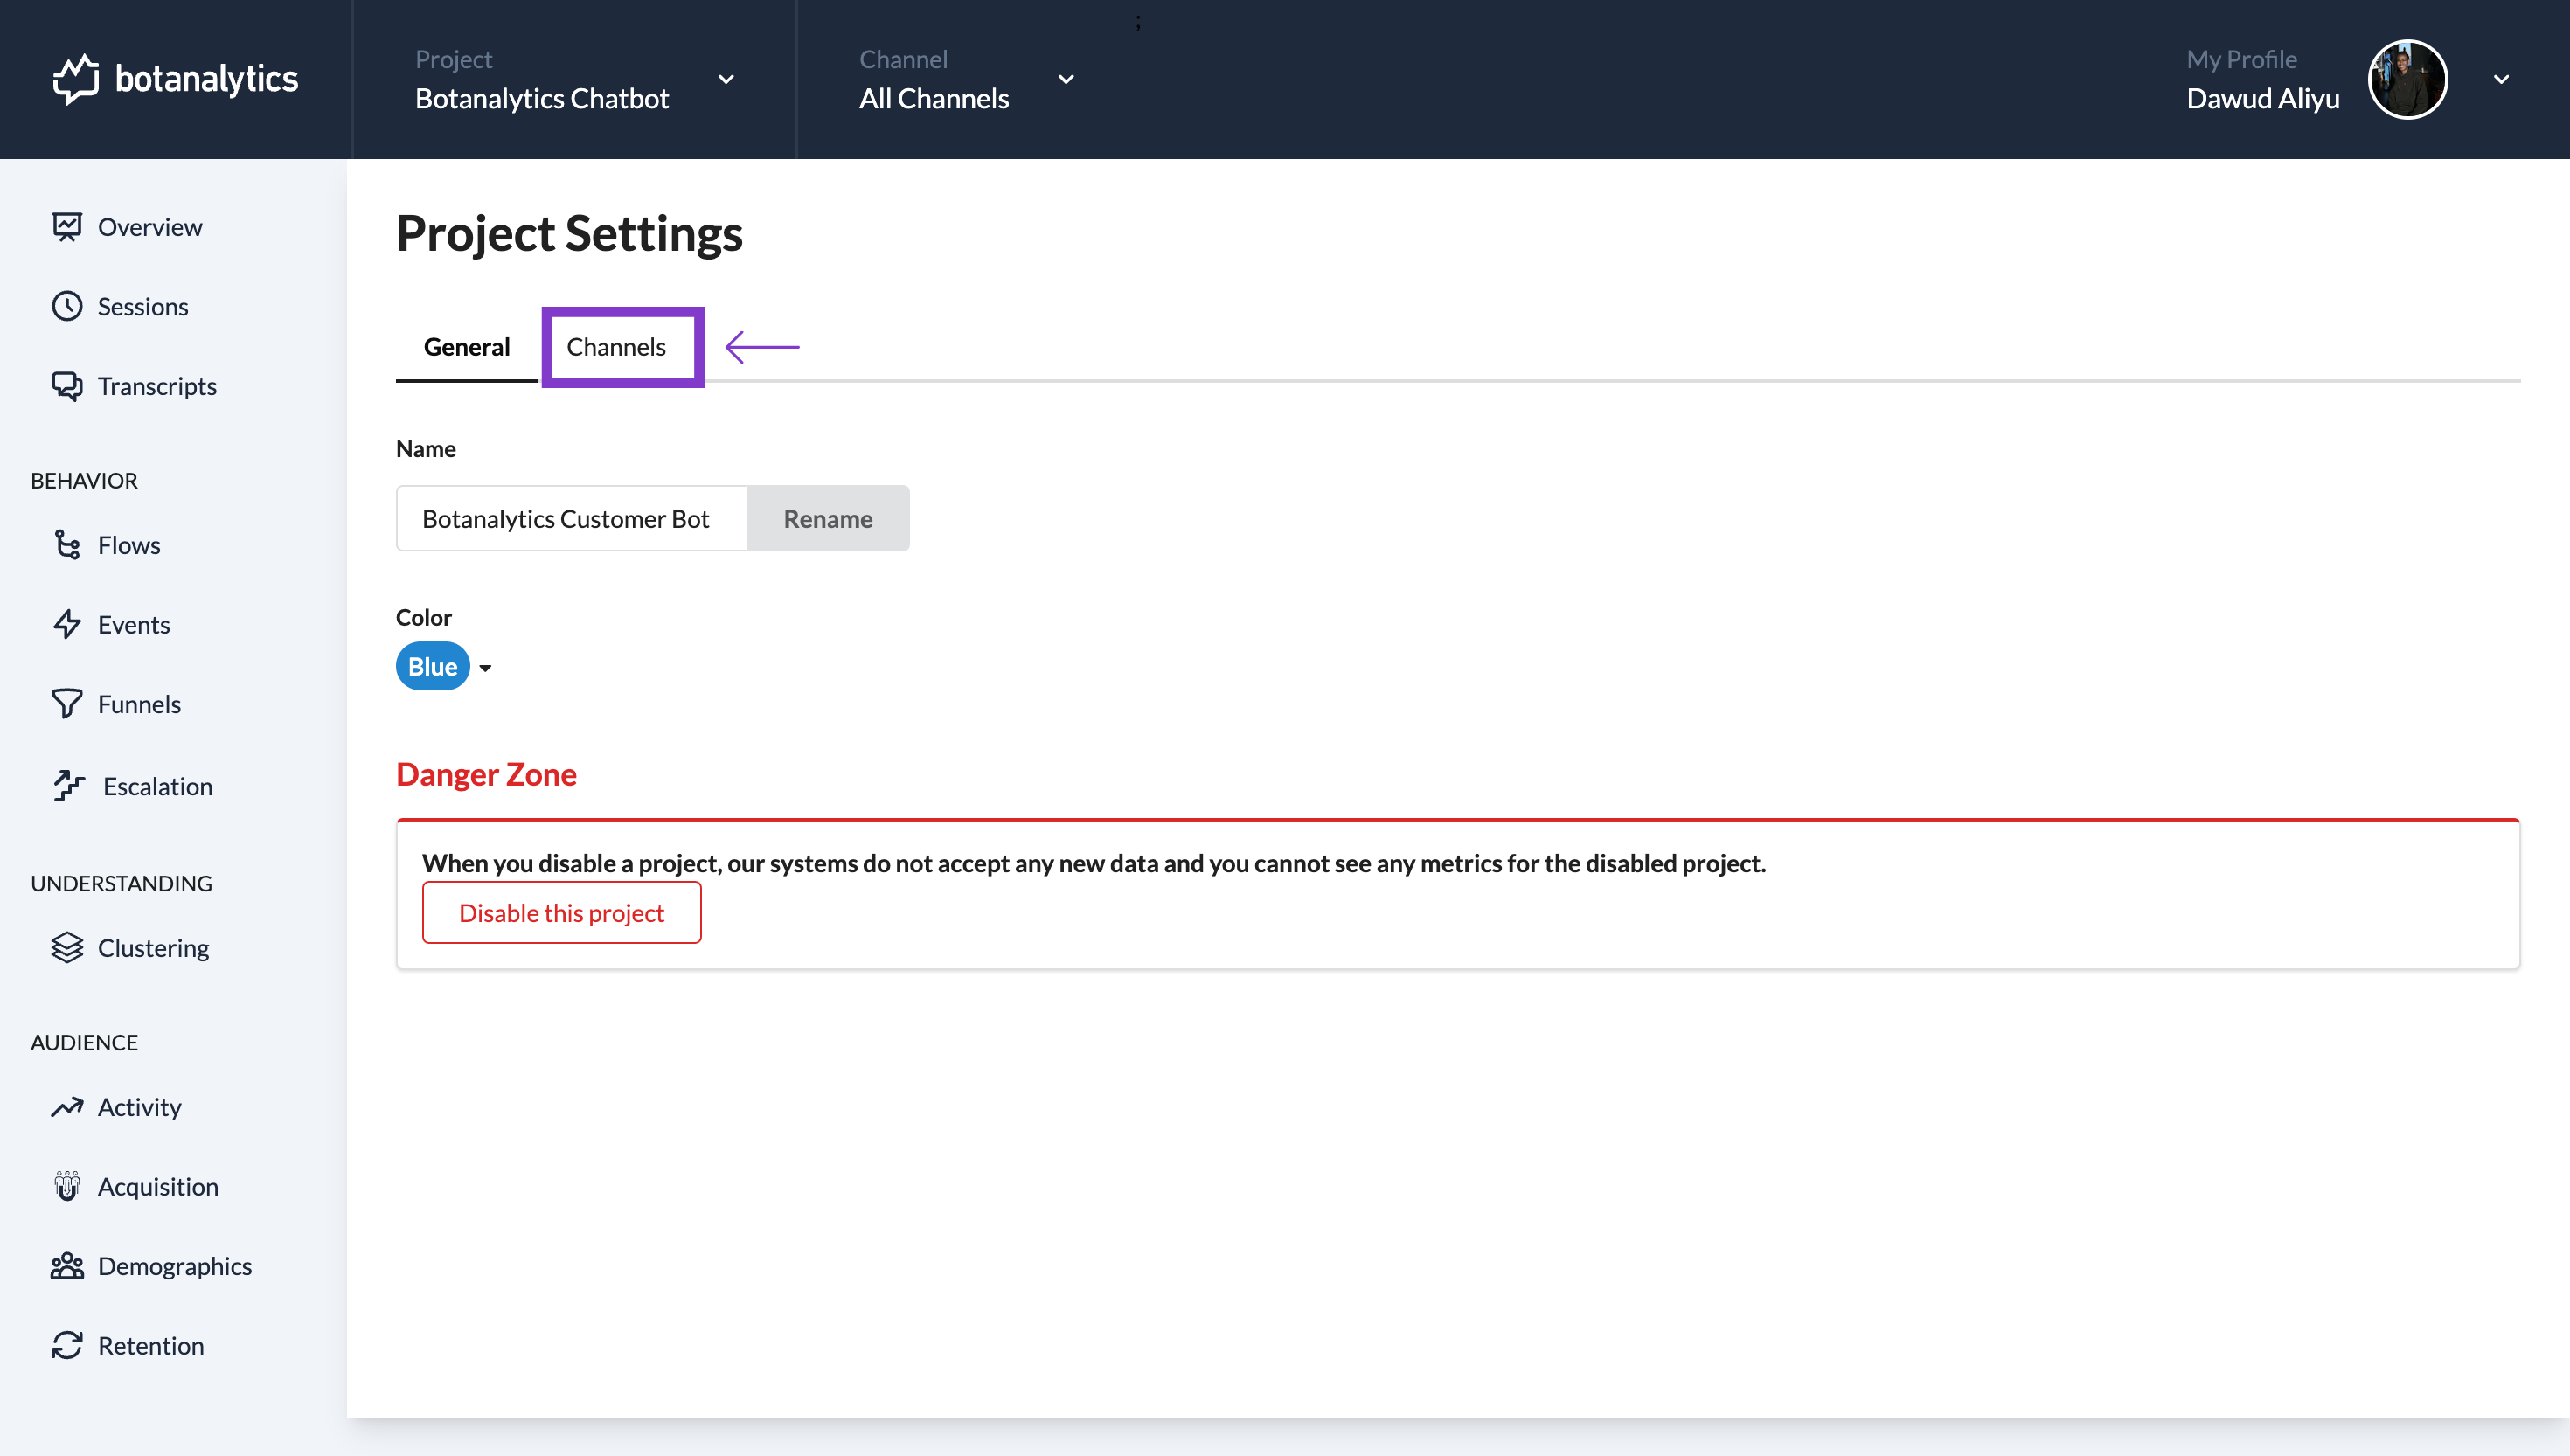
Navigate to Channels
- In the settings window, you will see different sections, including "General" and "Channels."
- Click on "Channels" to manage your connected channels.
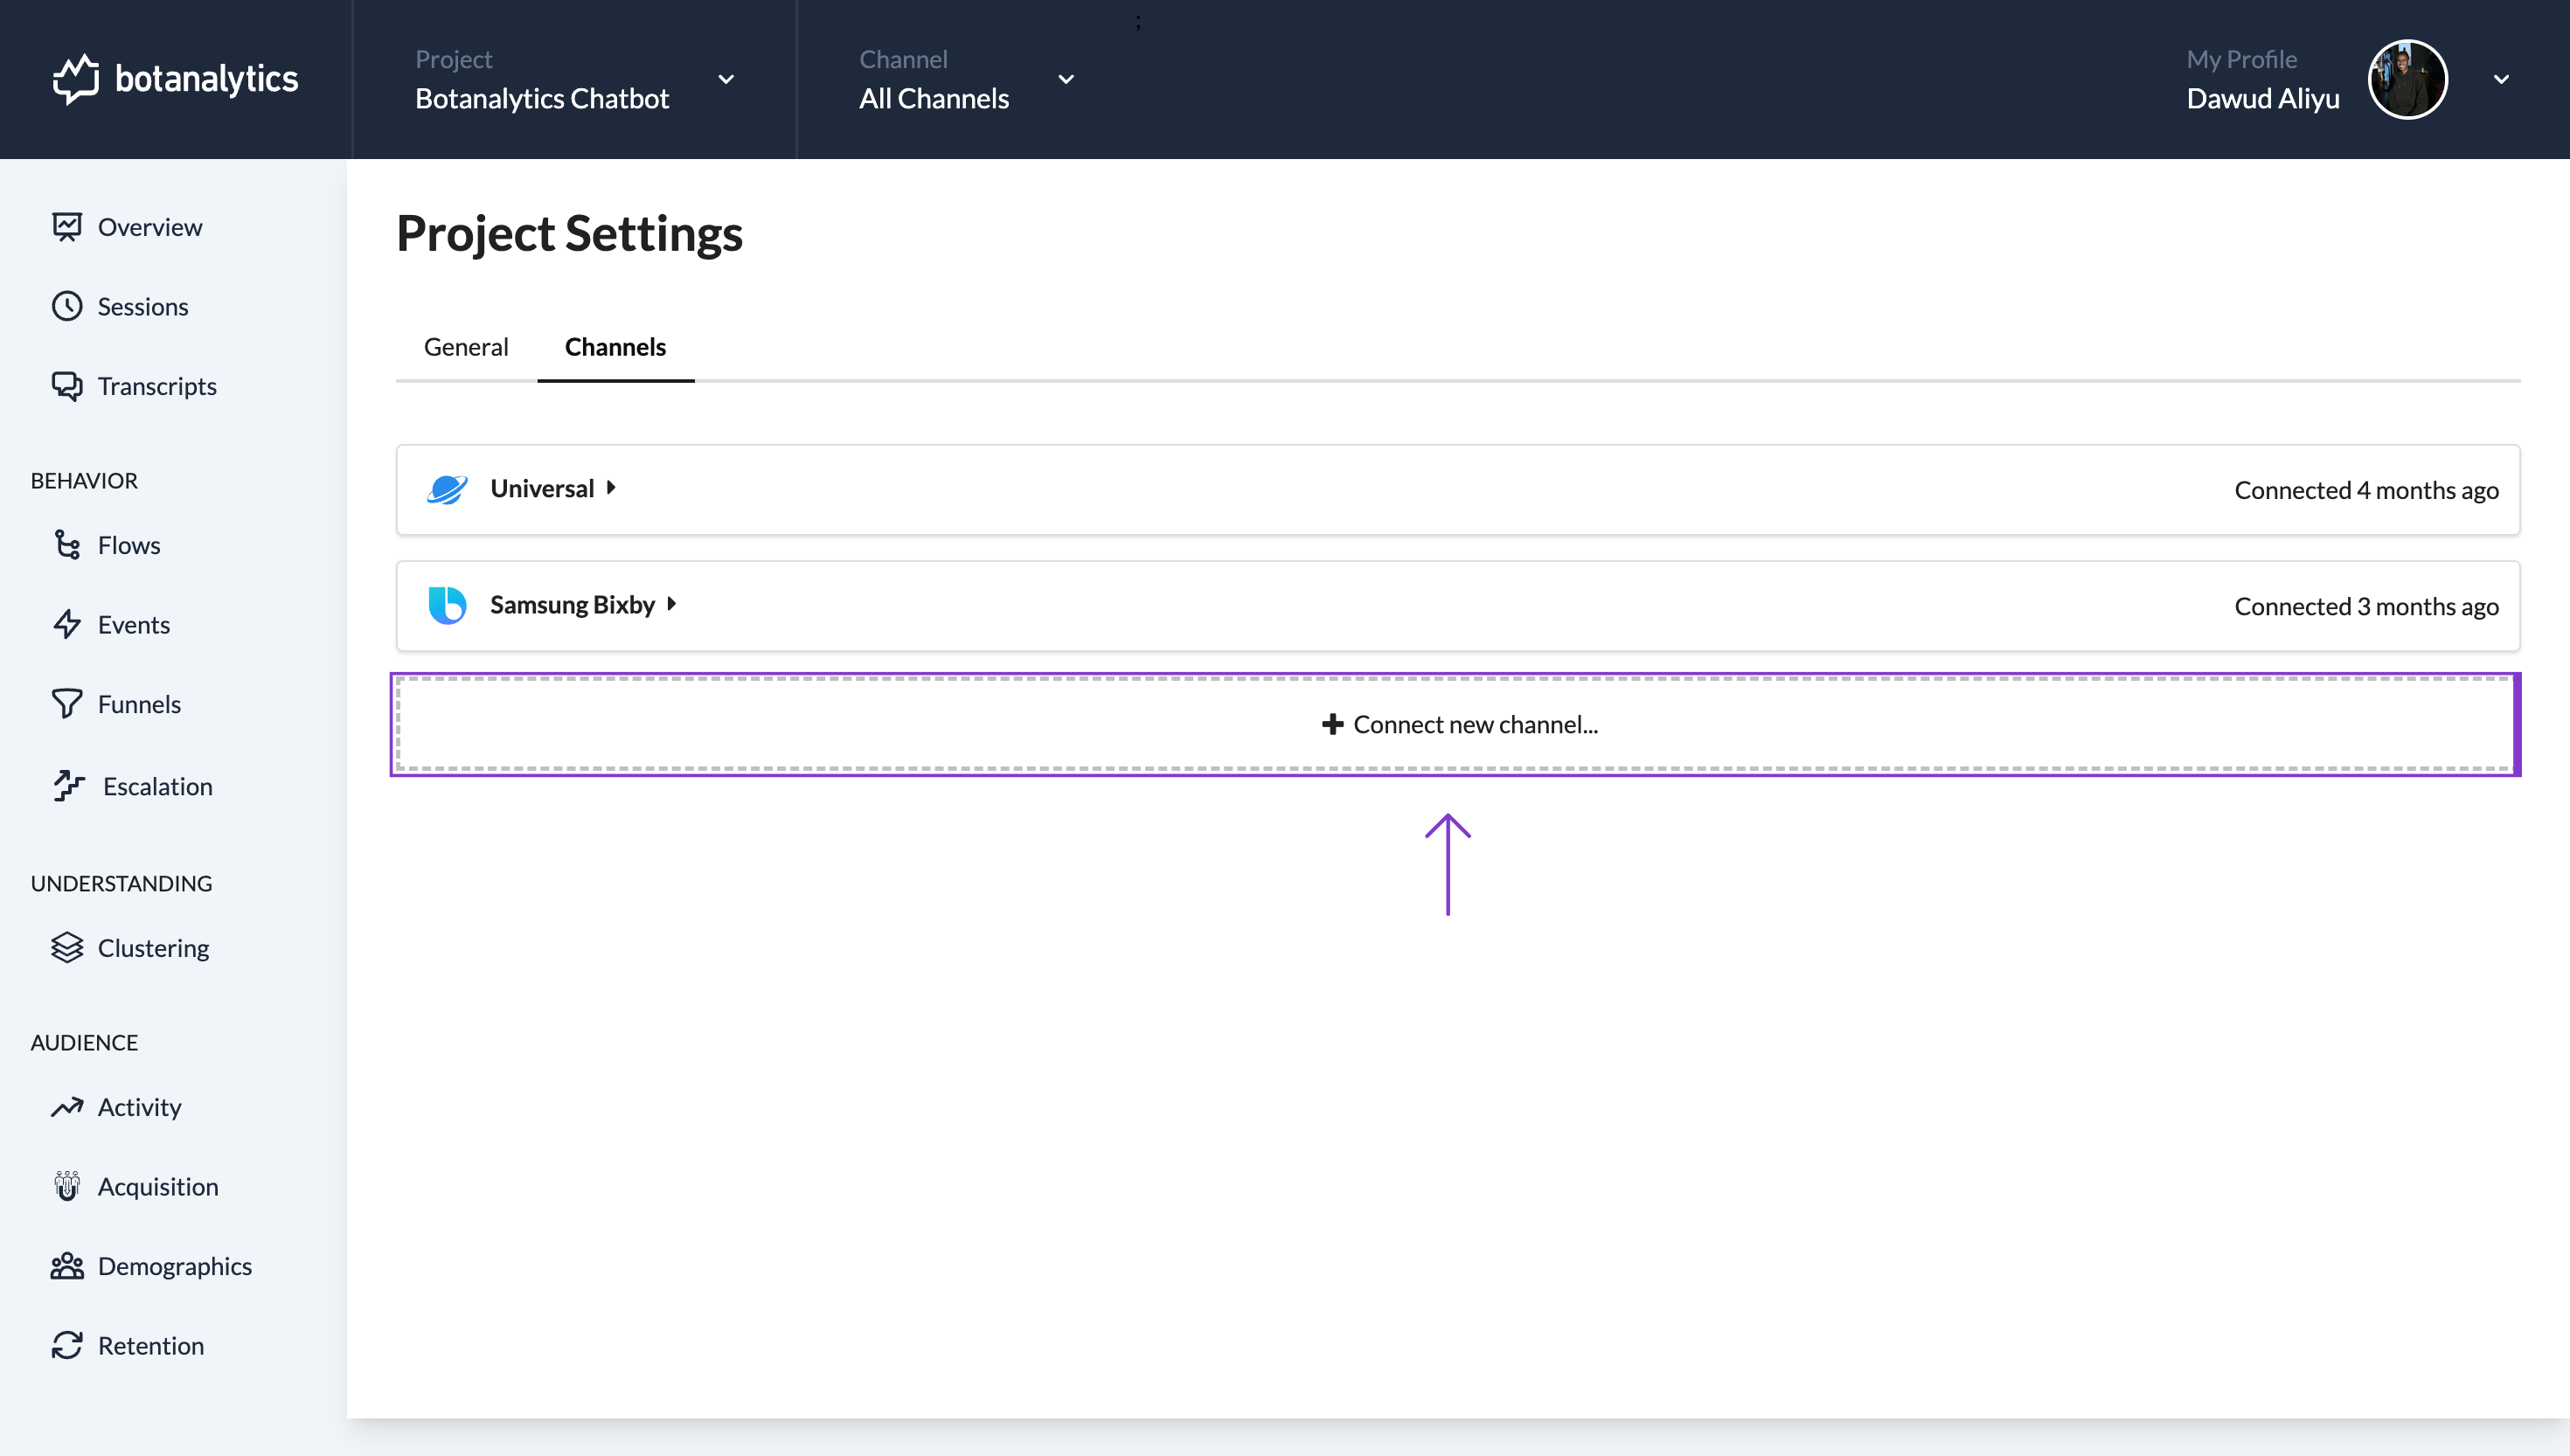
Connect New Channel
- Under the "Channels" section, click on the "Connect New Channel" button.
Choose Your Preferred Channel
- A new window will appear.
- Click on select channel to display a list of available channels.
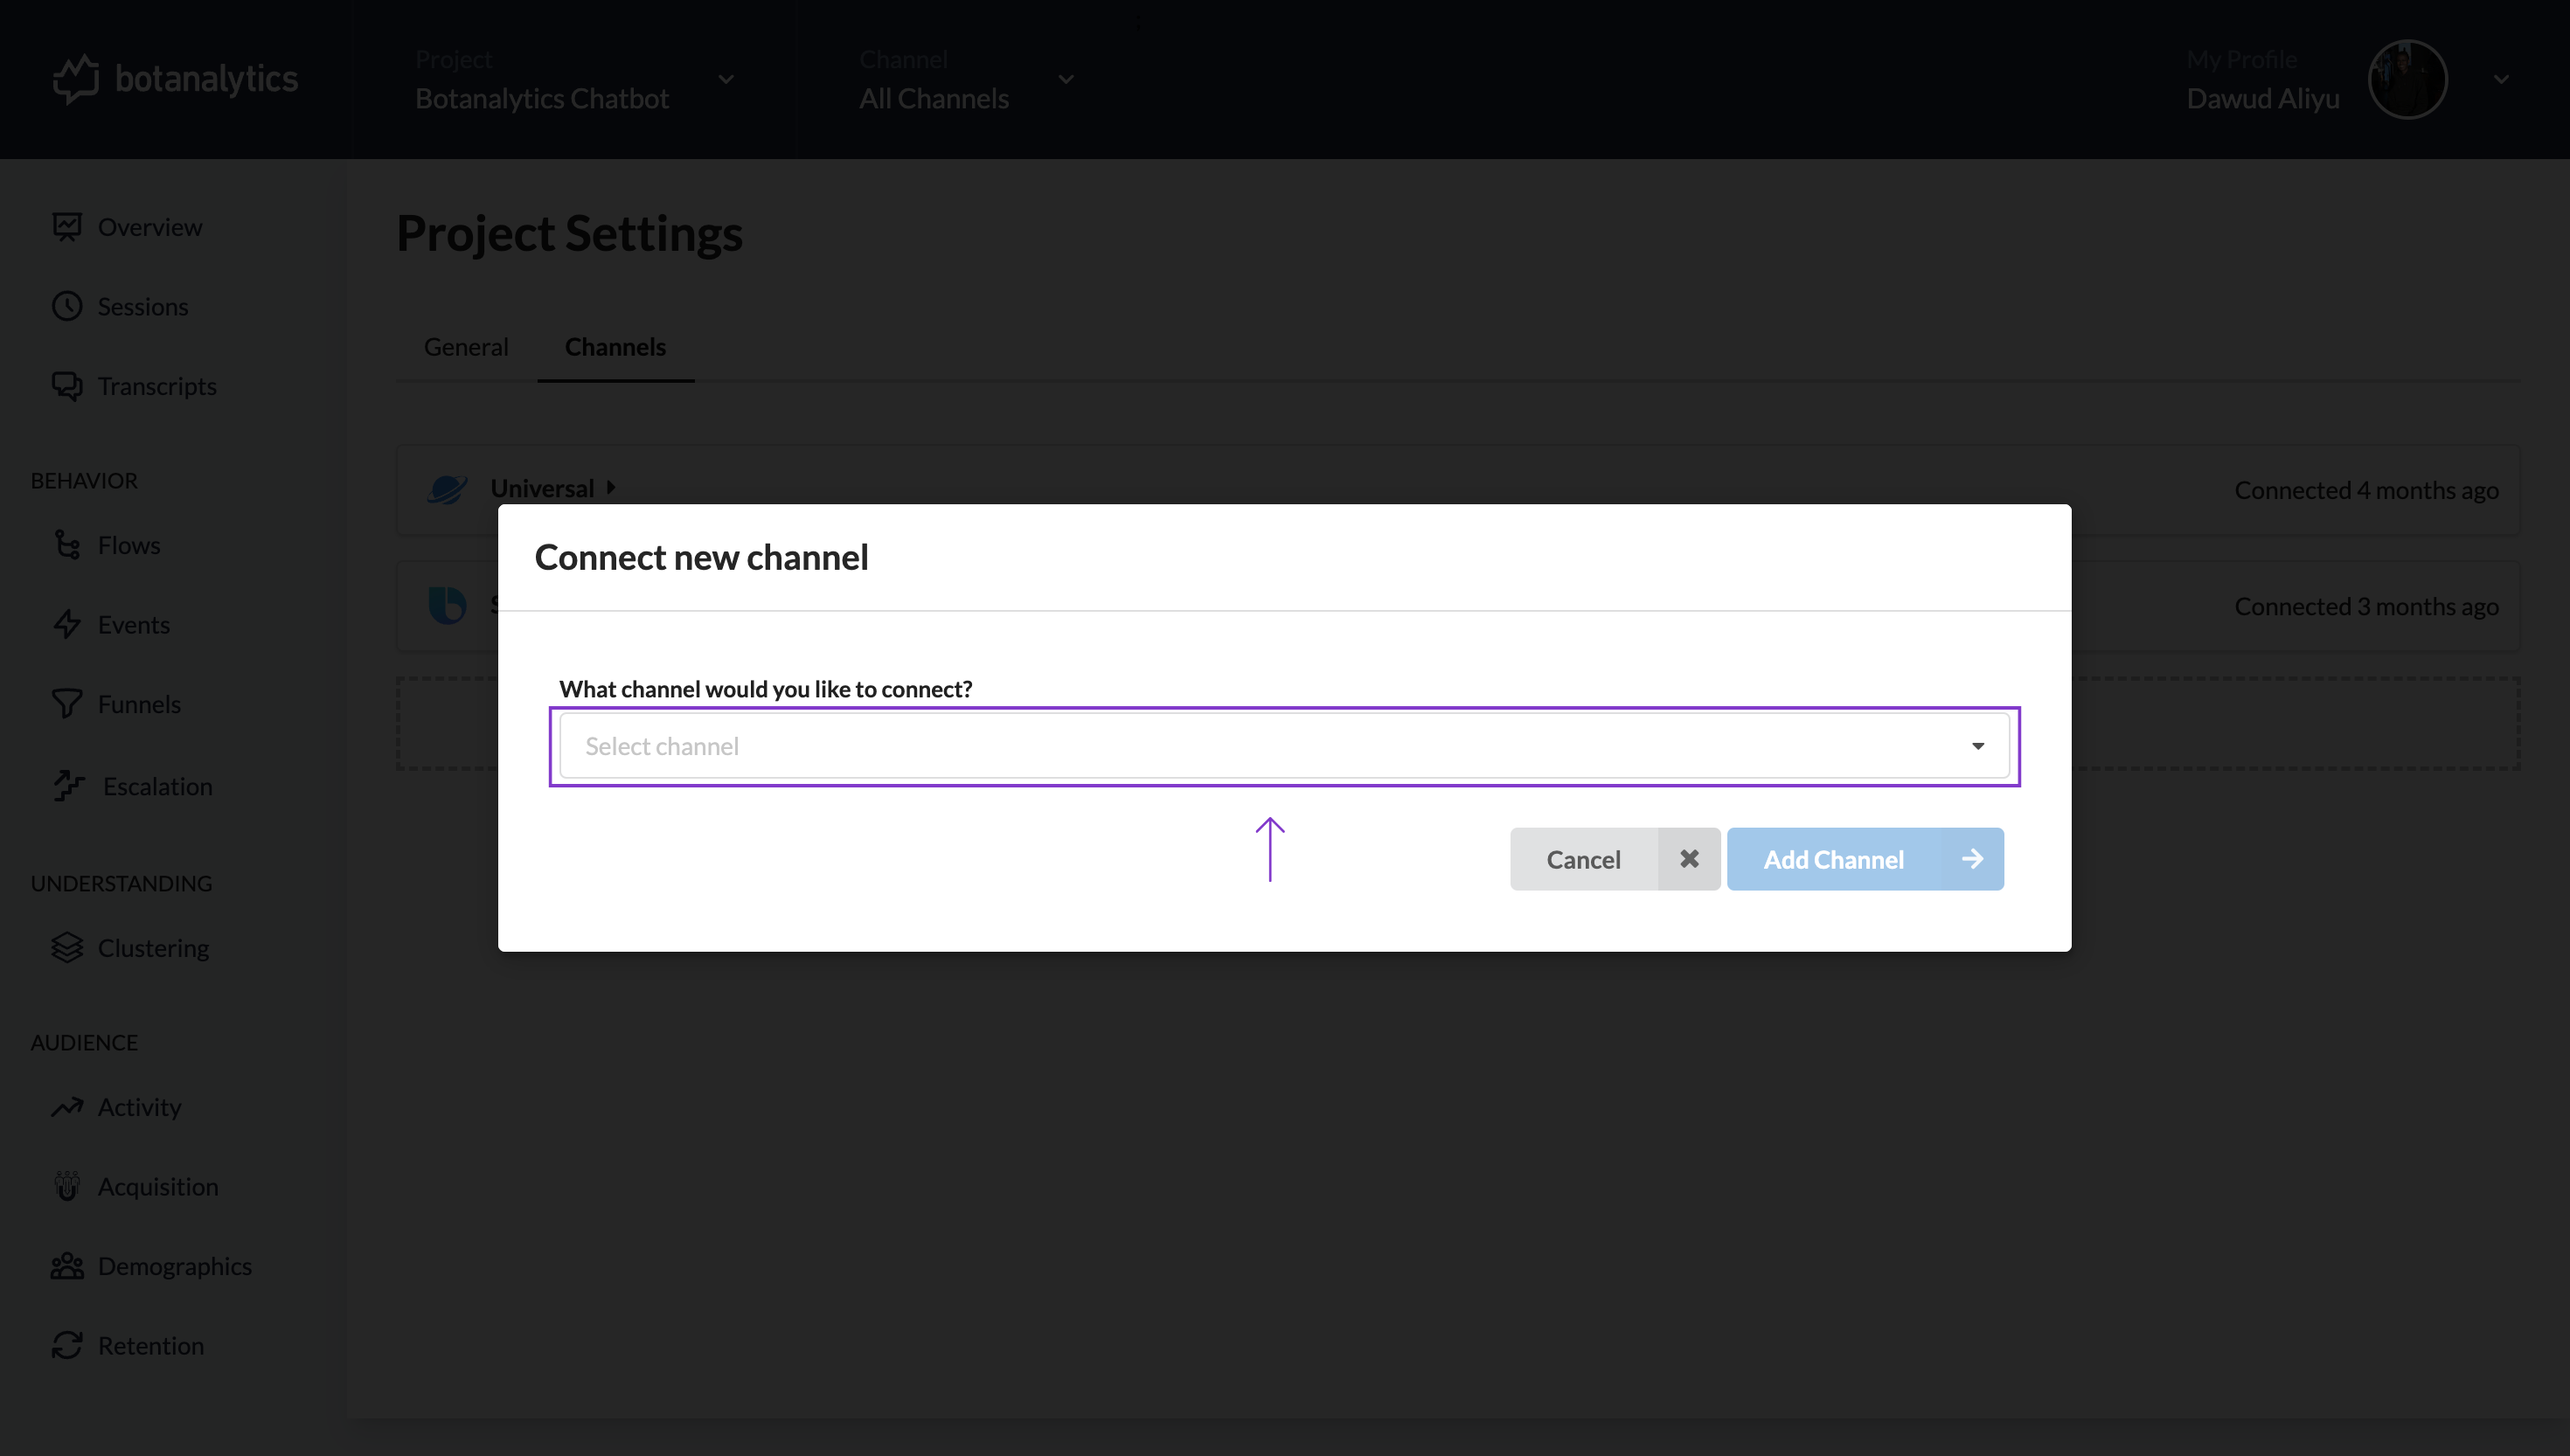
- Select your preferred channel from the list.
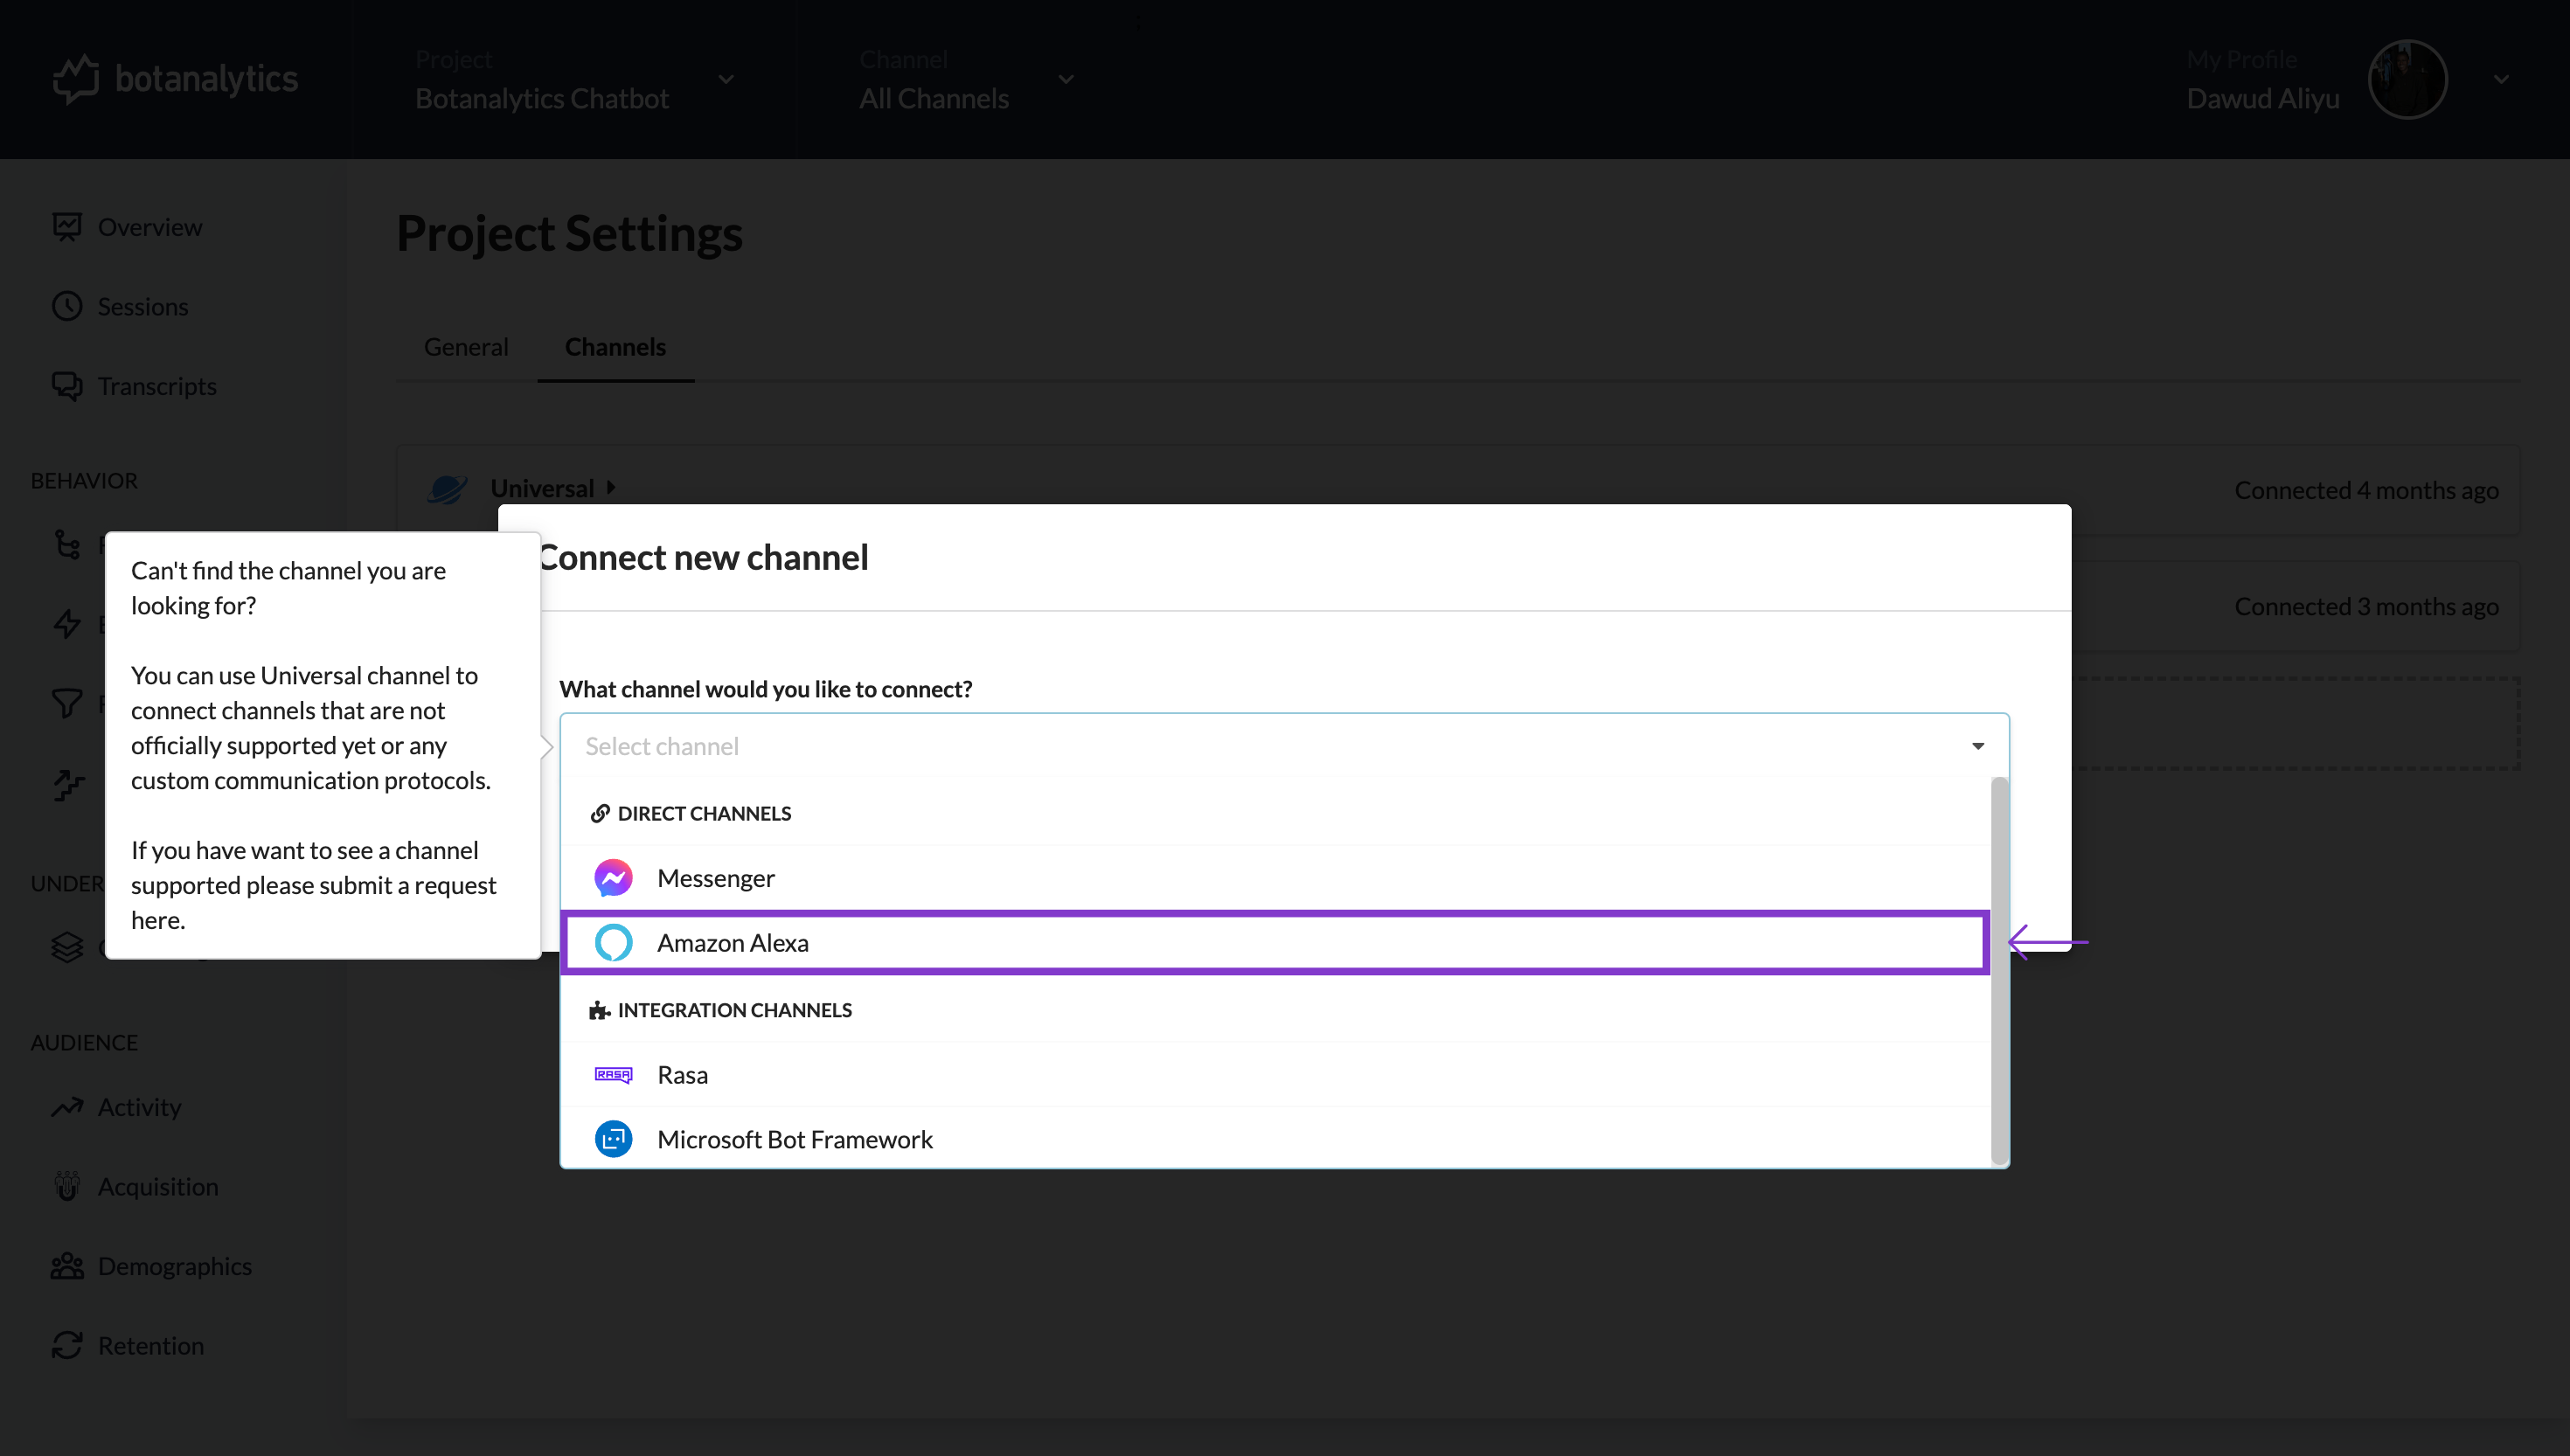
Add Channel
- Then Click on 'Add Channel'
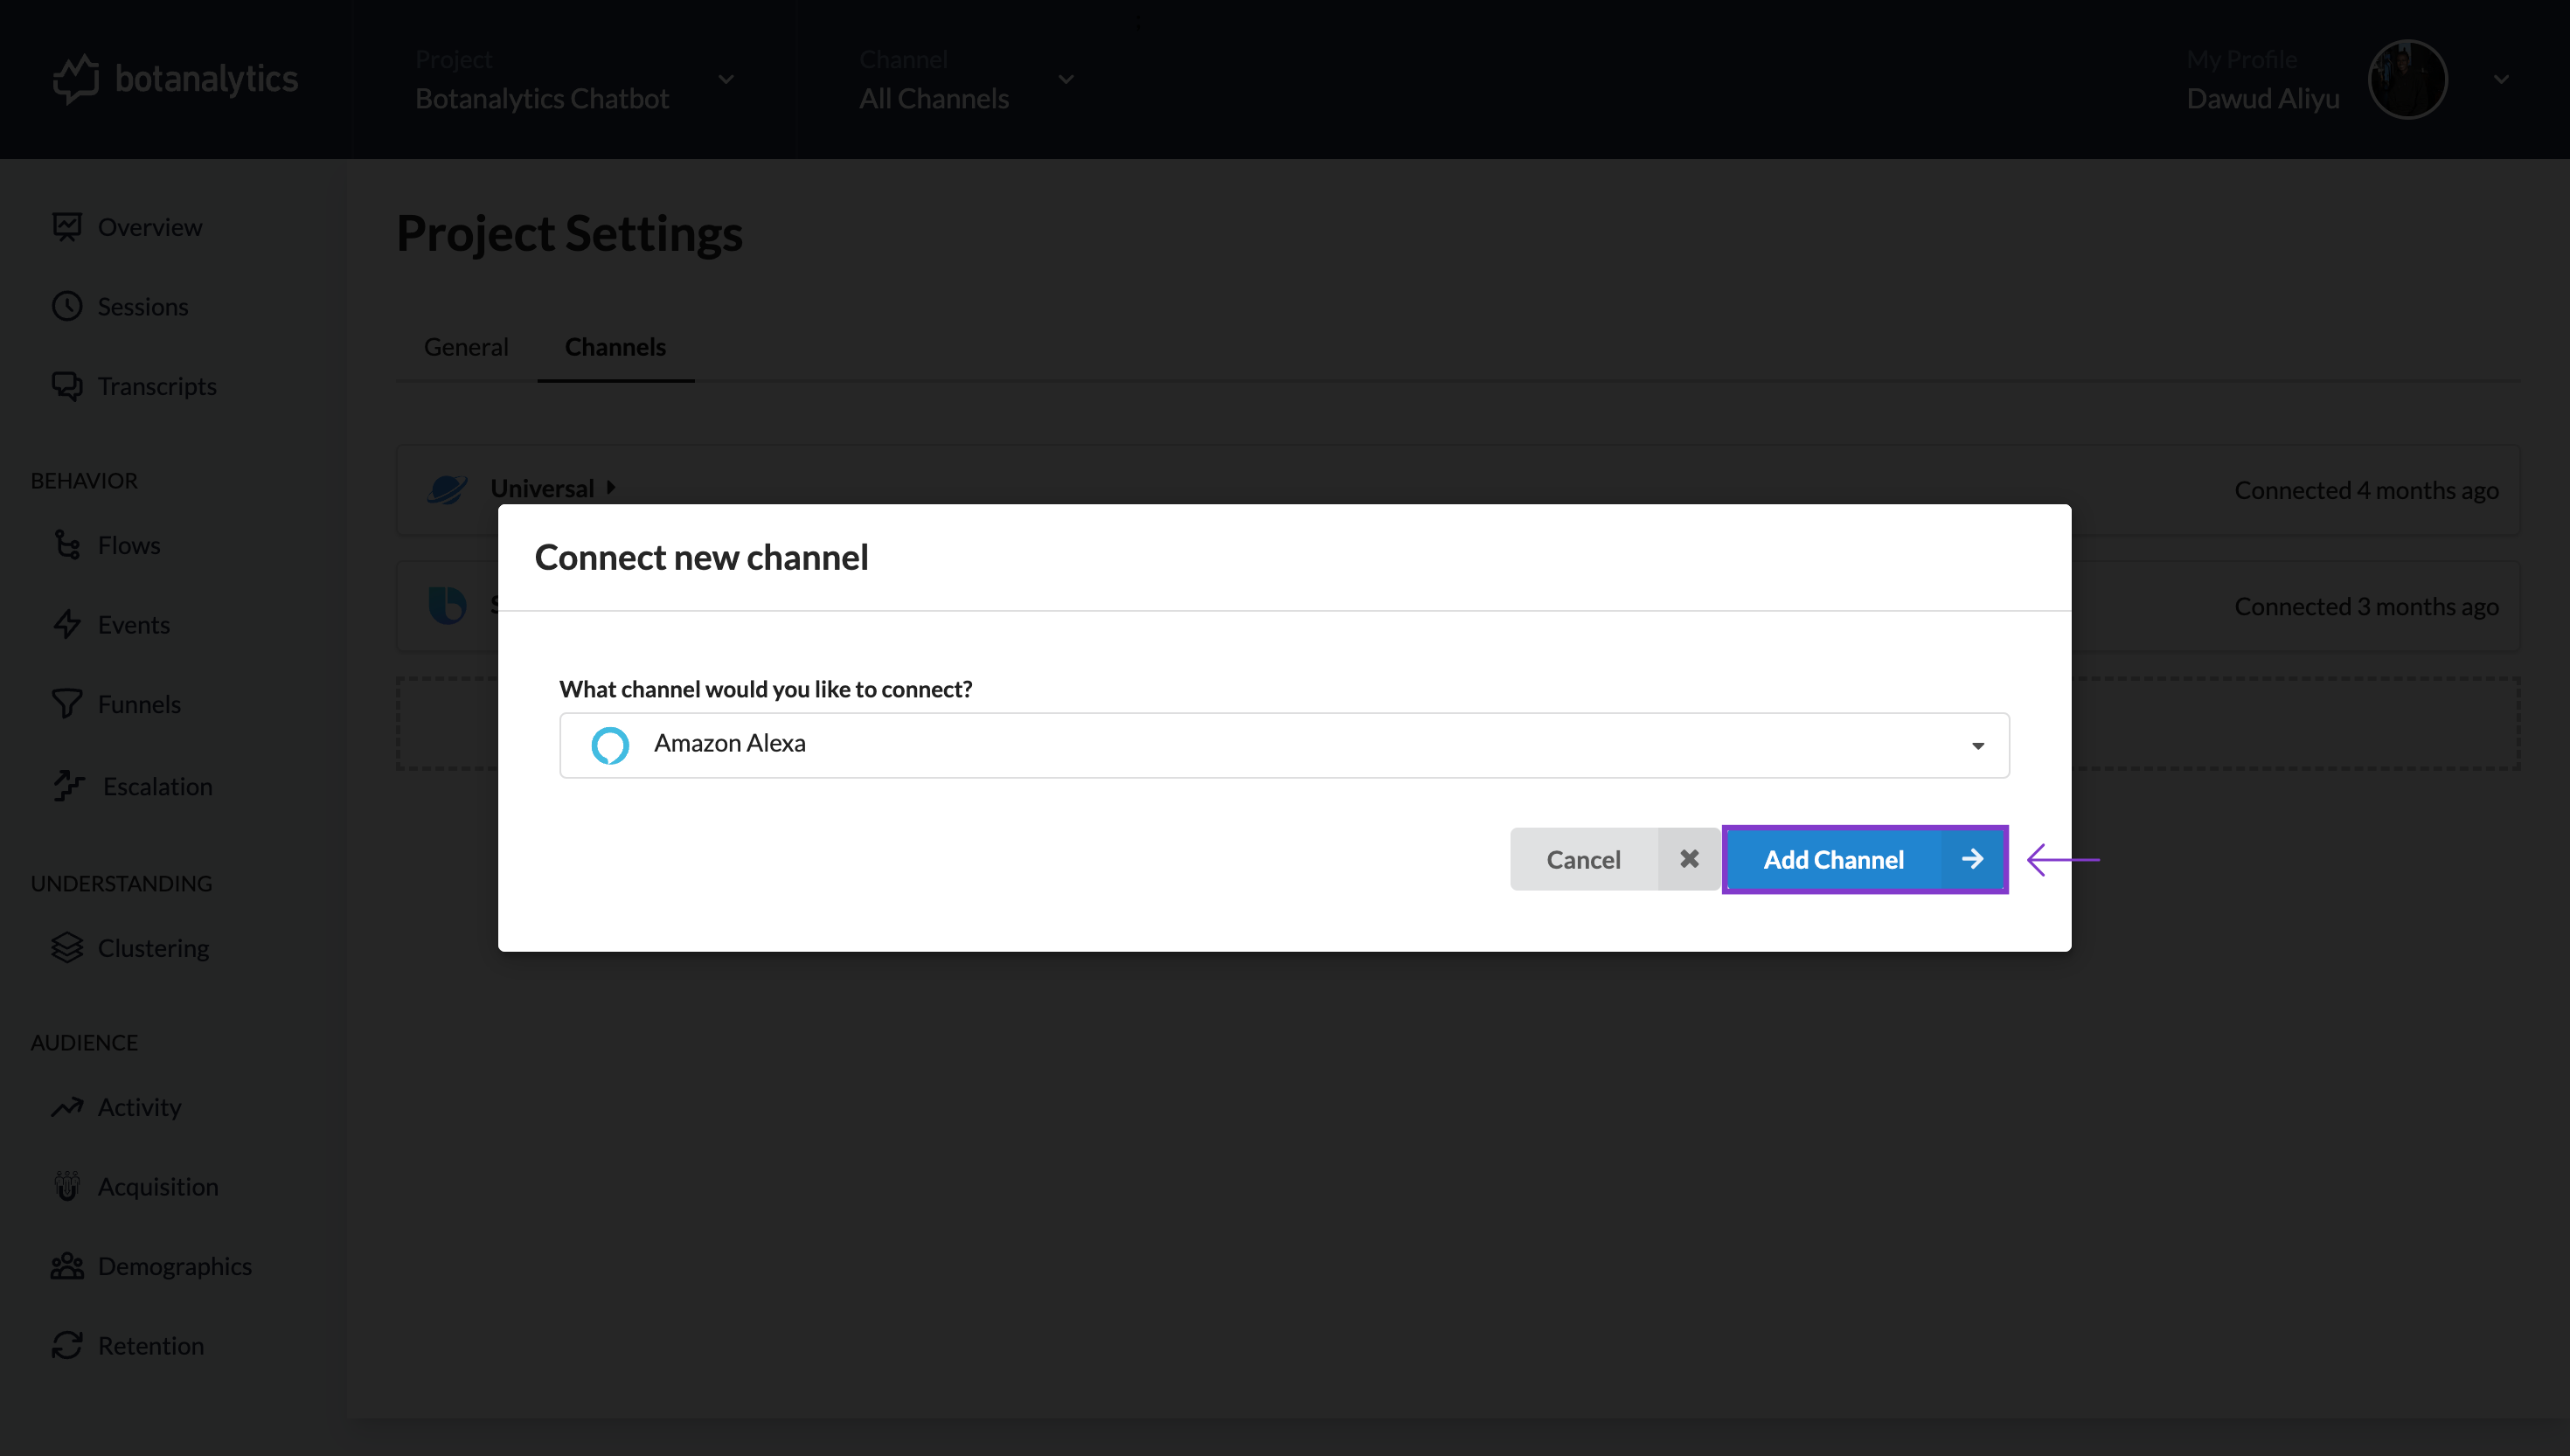
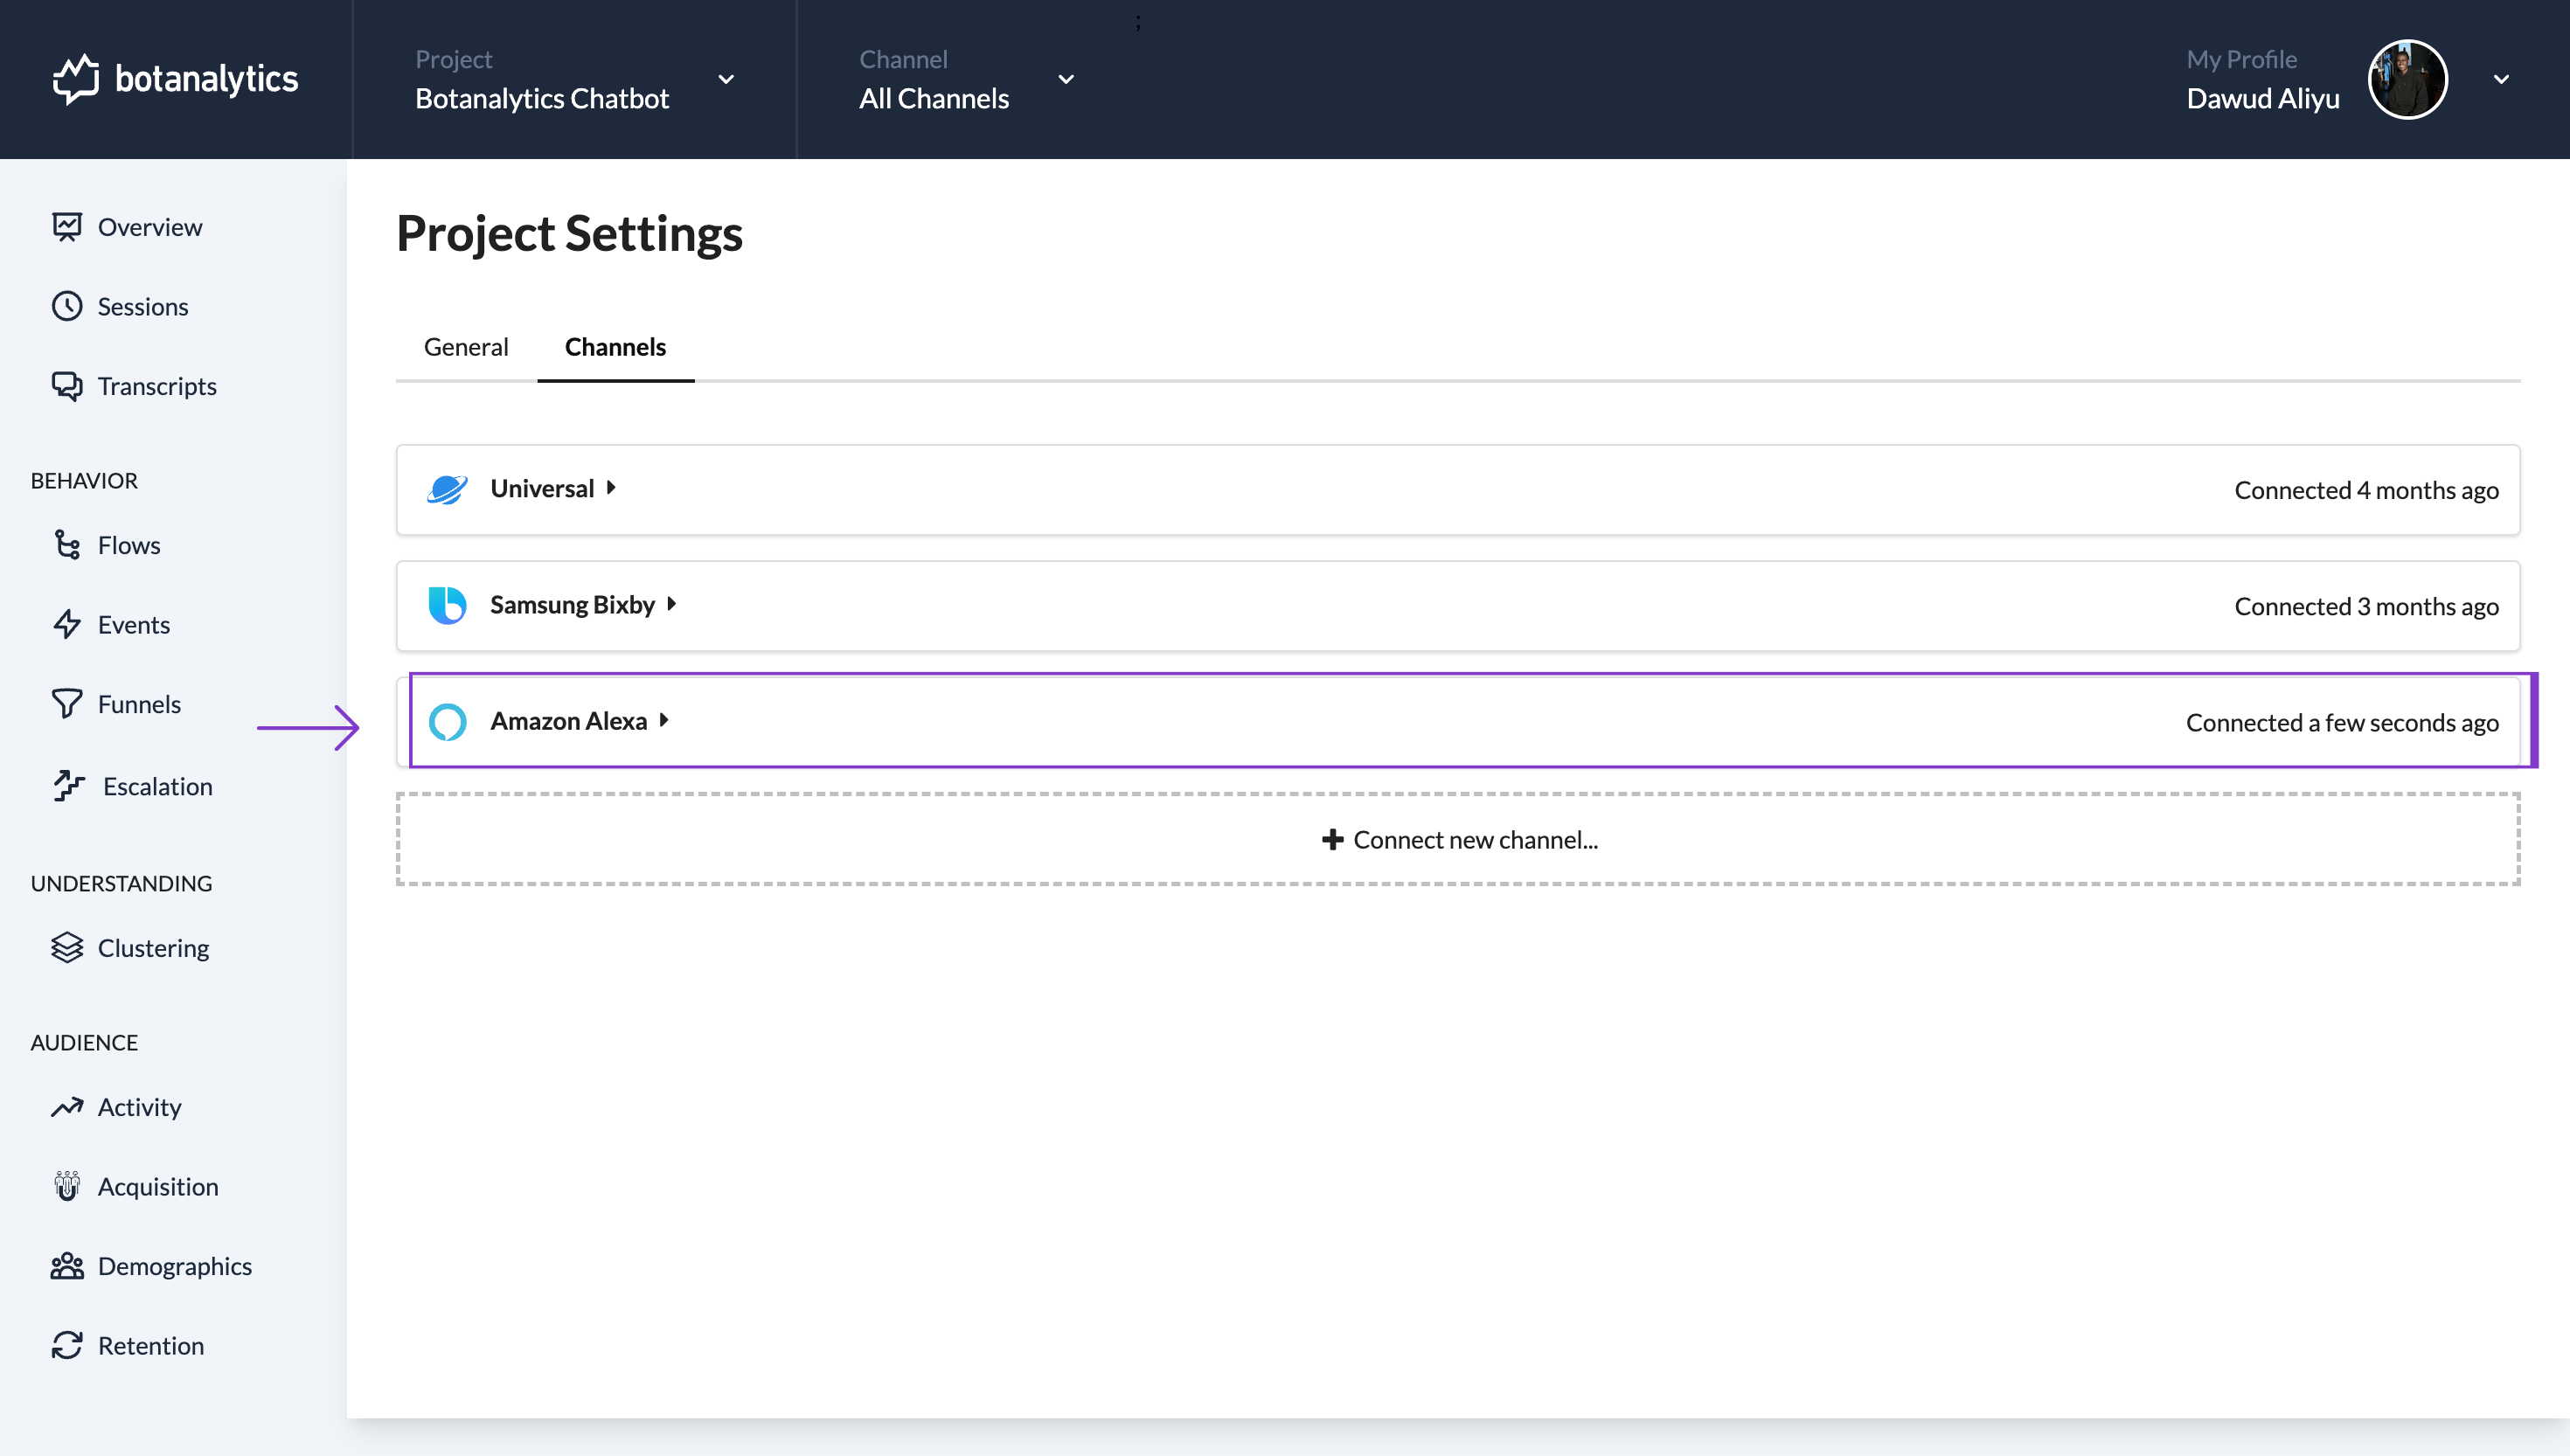
Channel Added and Displayed
- After selecting the channel, it will be displayed in the "Channels" window.
Method 2: Adding a Channel from the Projects Dashboard
Access the Dashboard
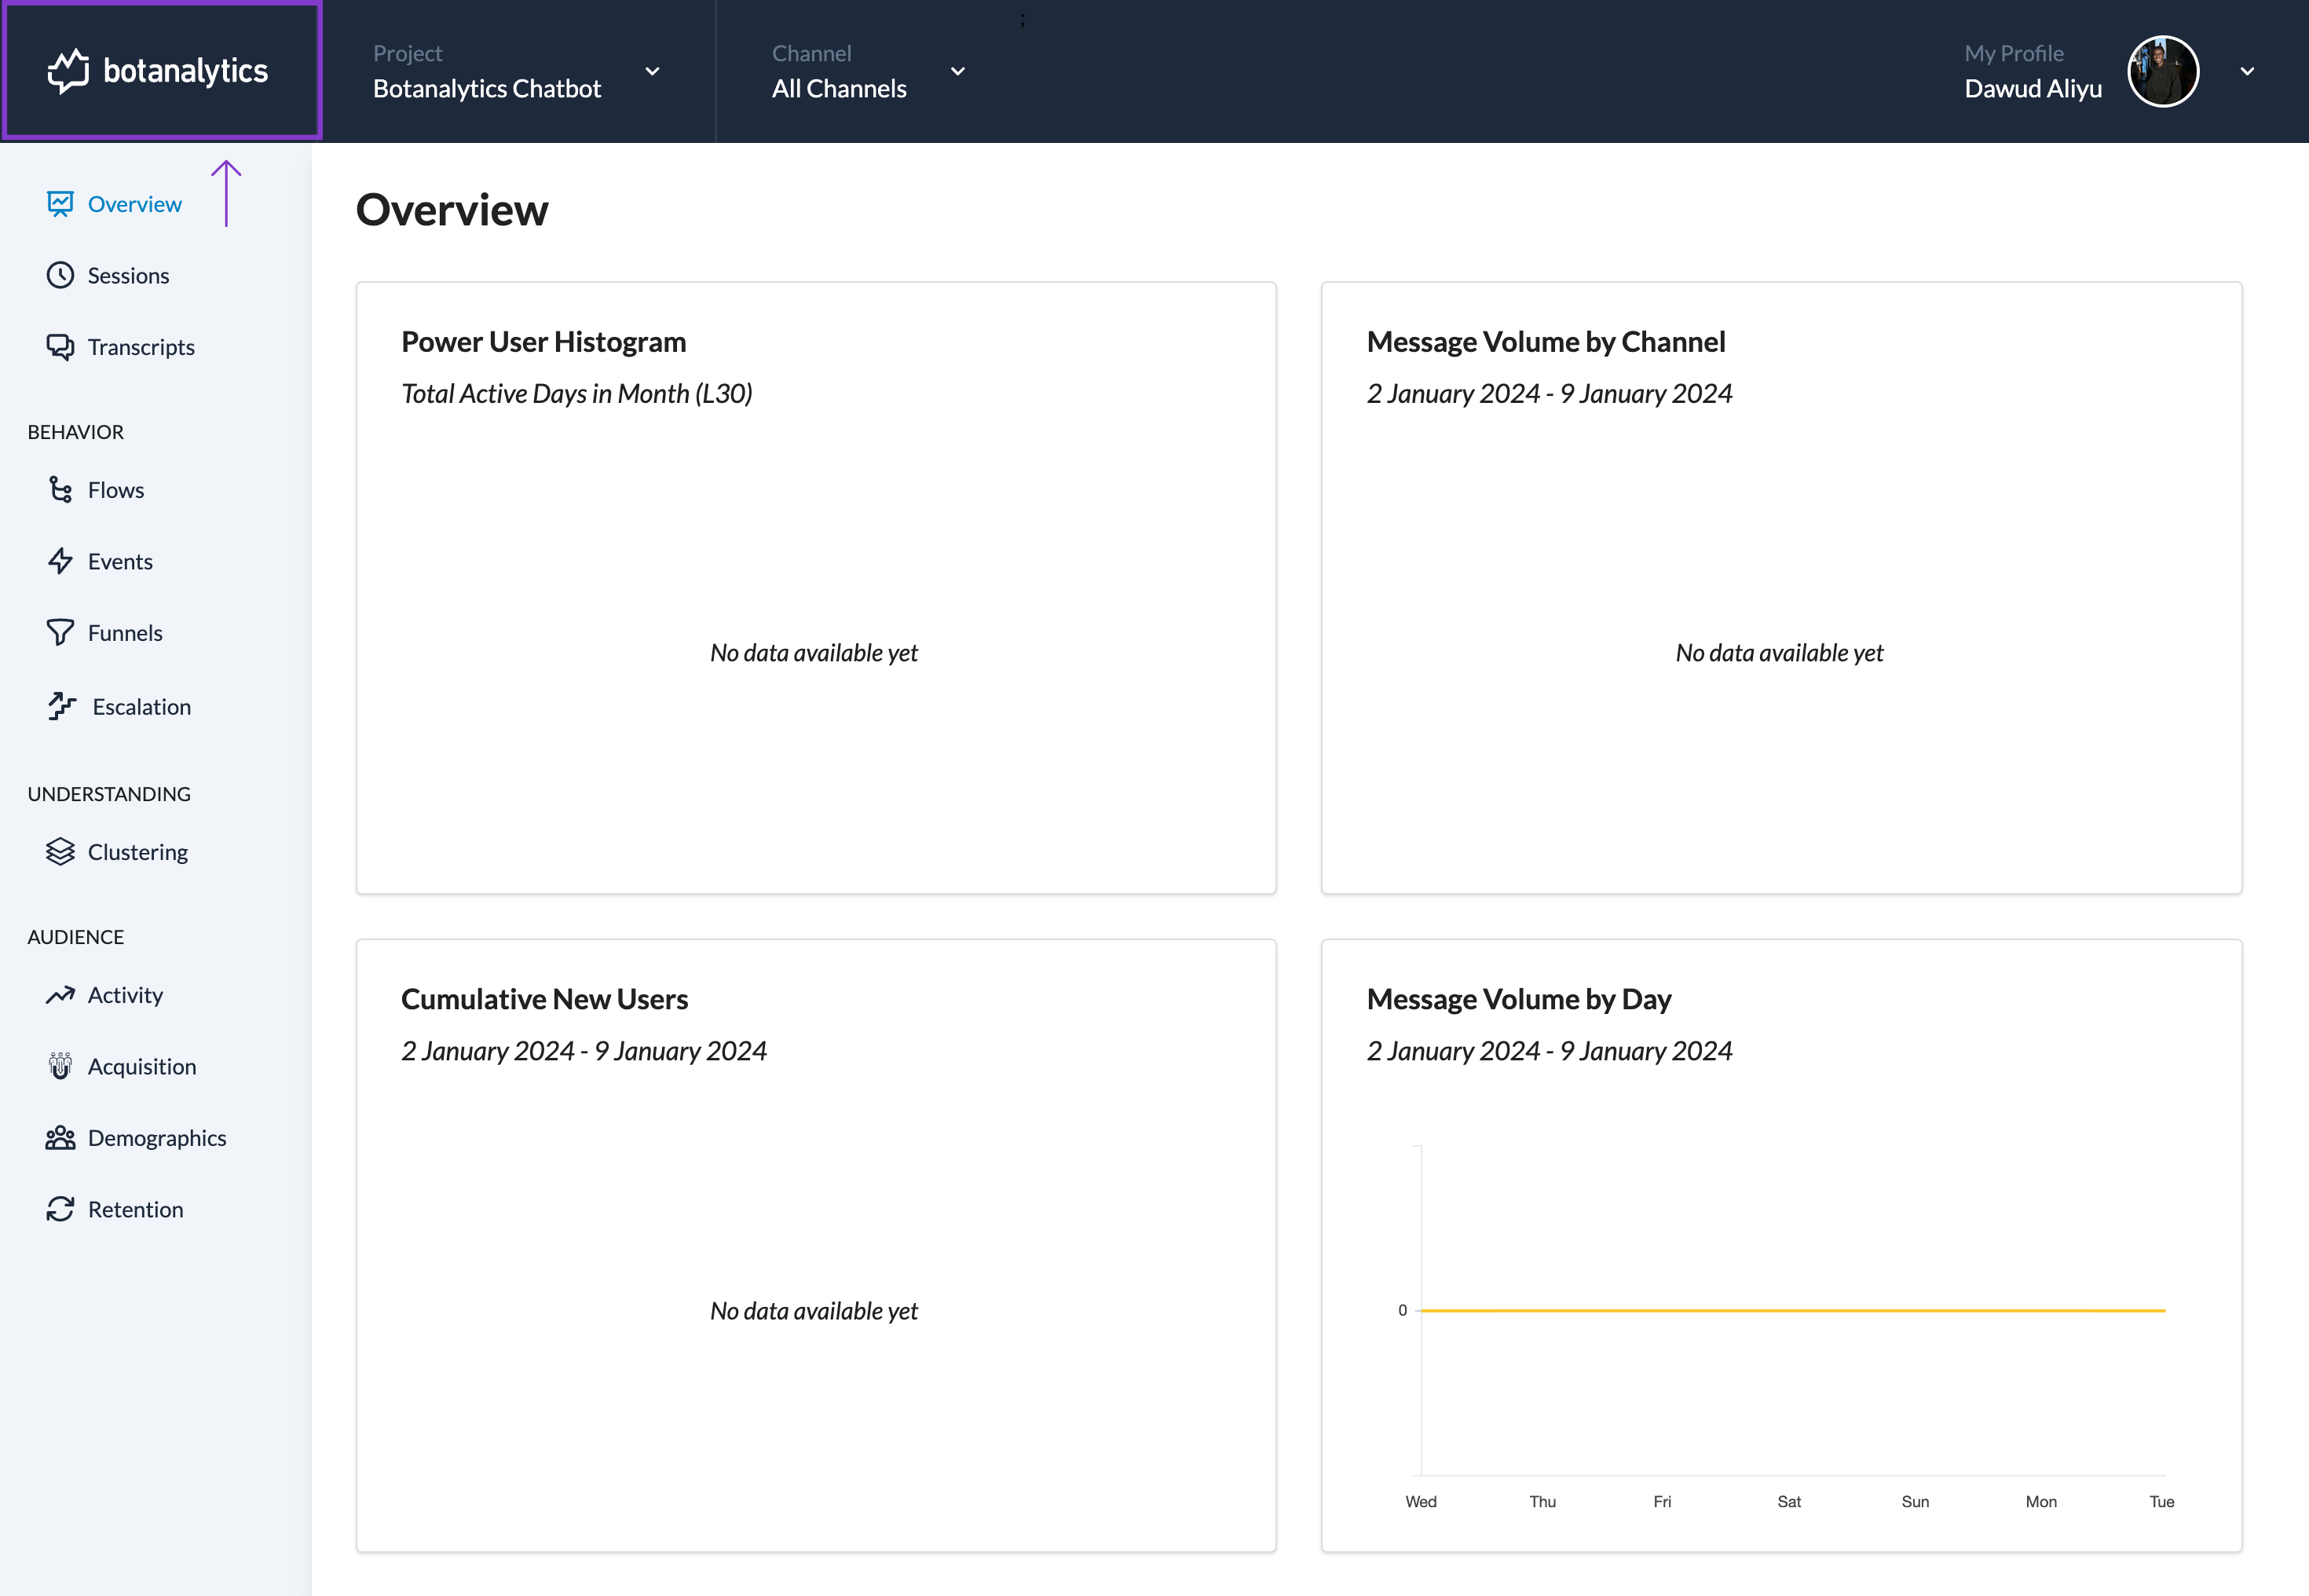
- Click on the Botanalytics logo in the top left corner to access the Projects dashboard.
Access Project Settings
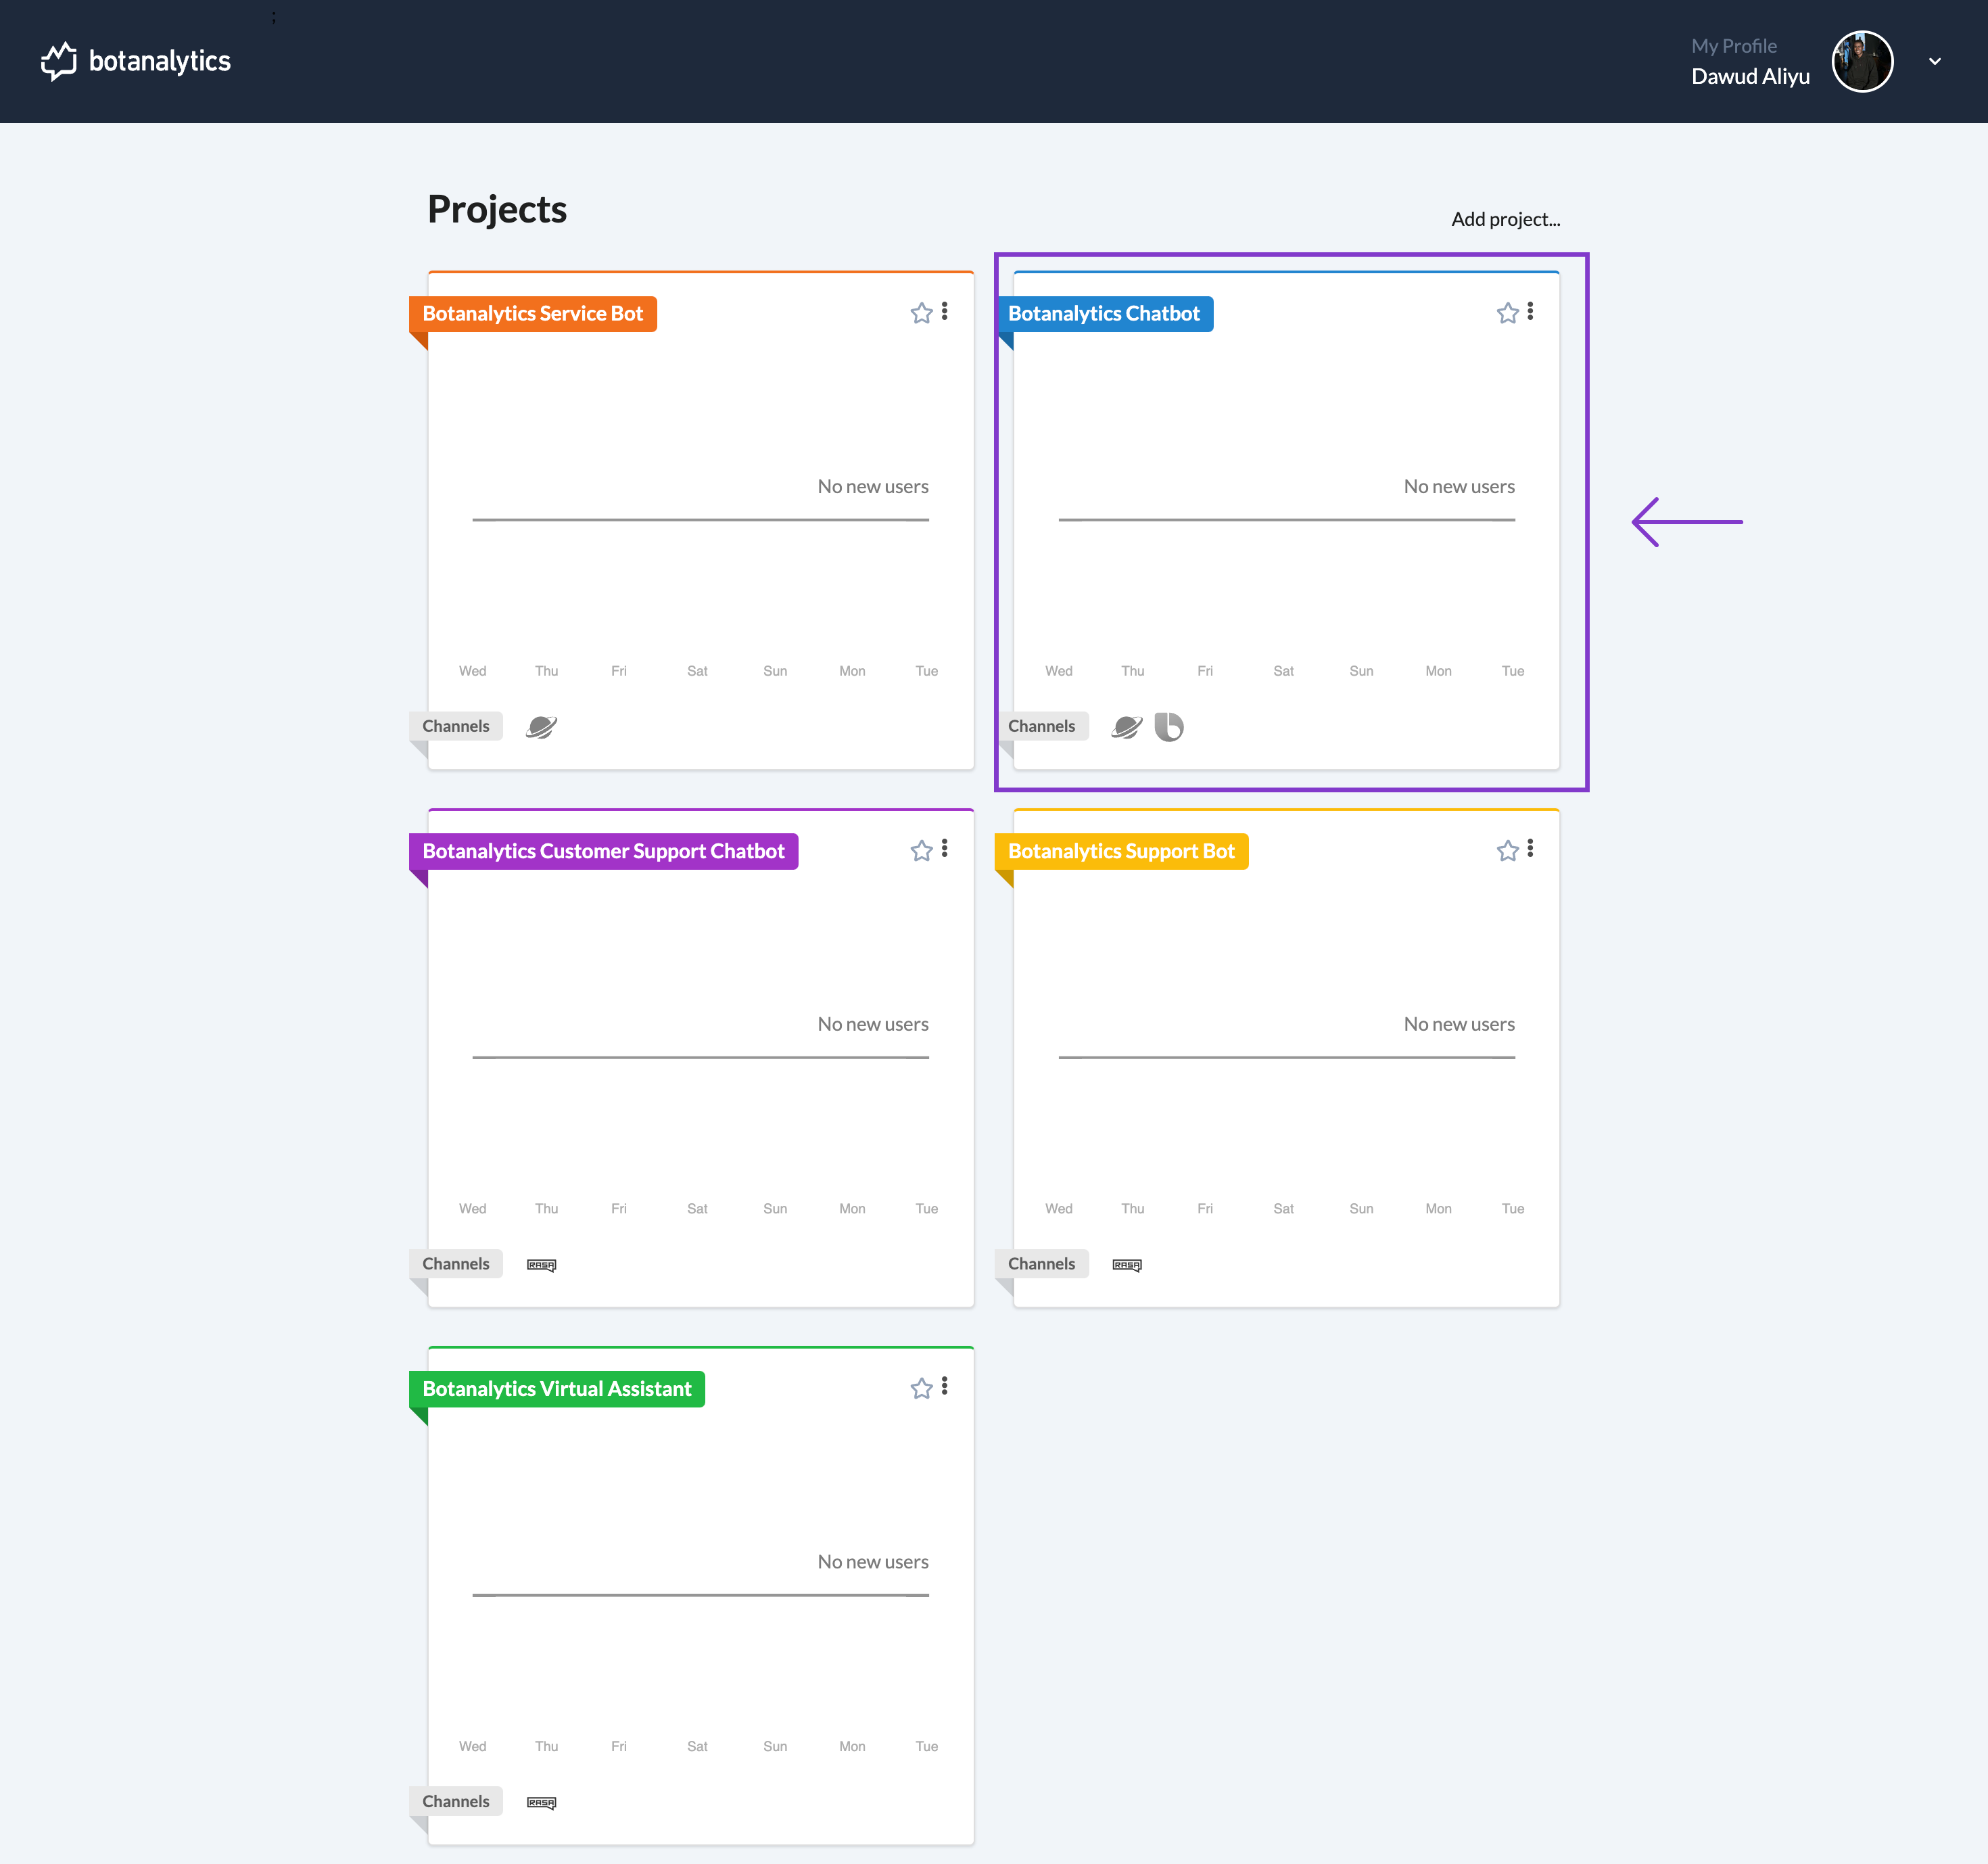
- In the Projects dashboard, locate the project you want to add a new channel to.
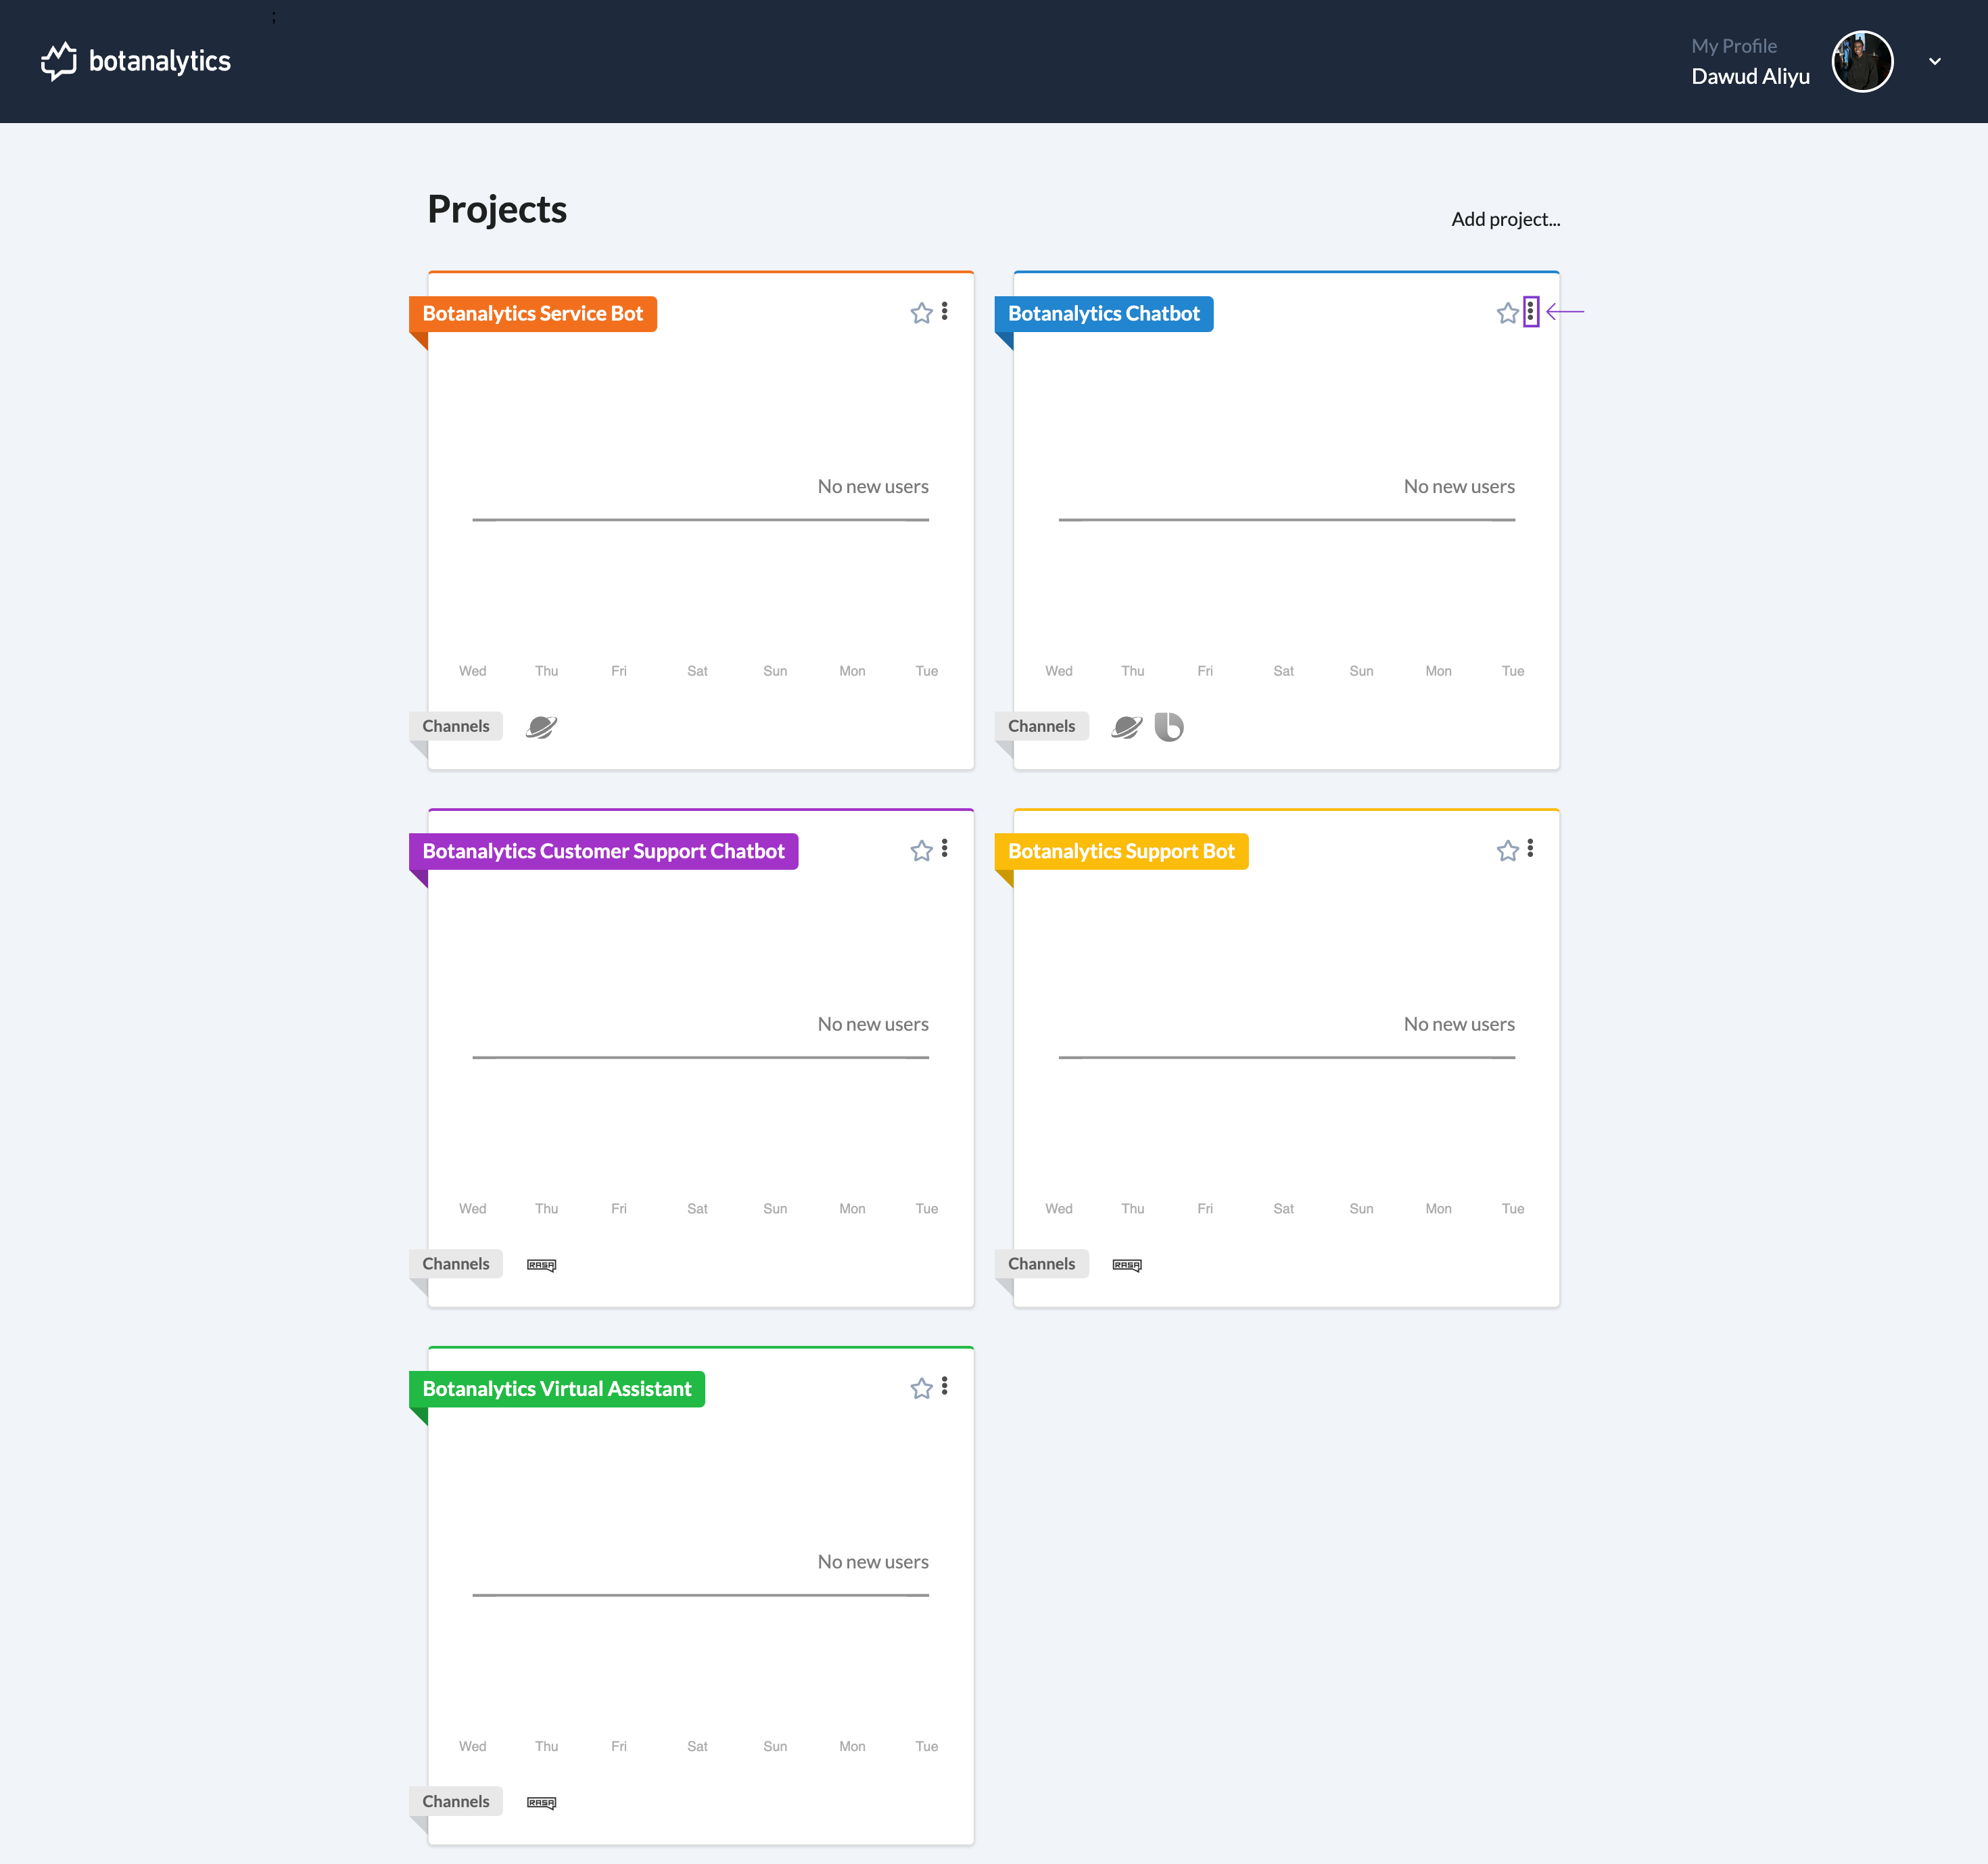
- Click on the three dots (ellipsis) icon in the top right corner to display a drop-down menu.
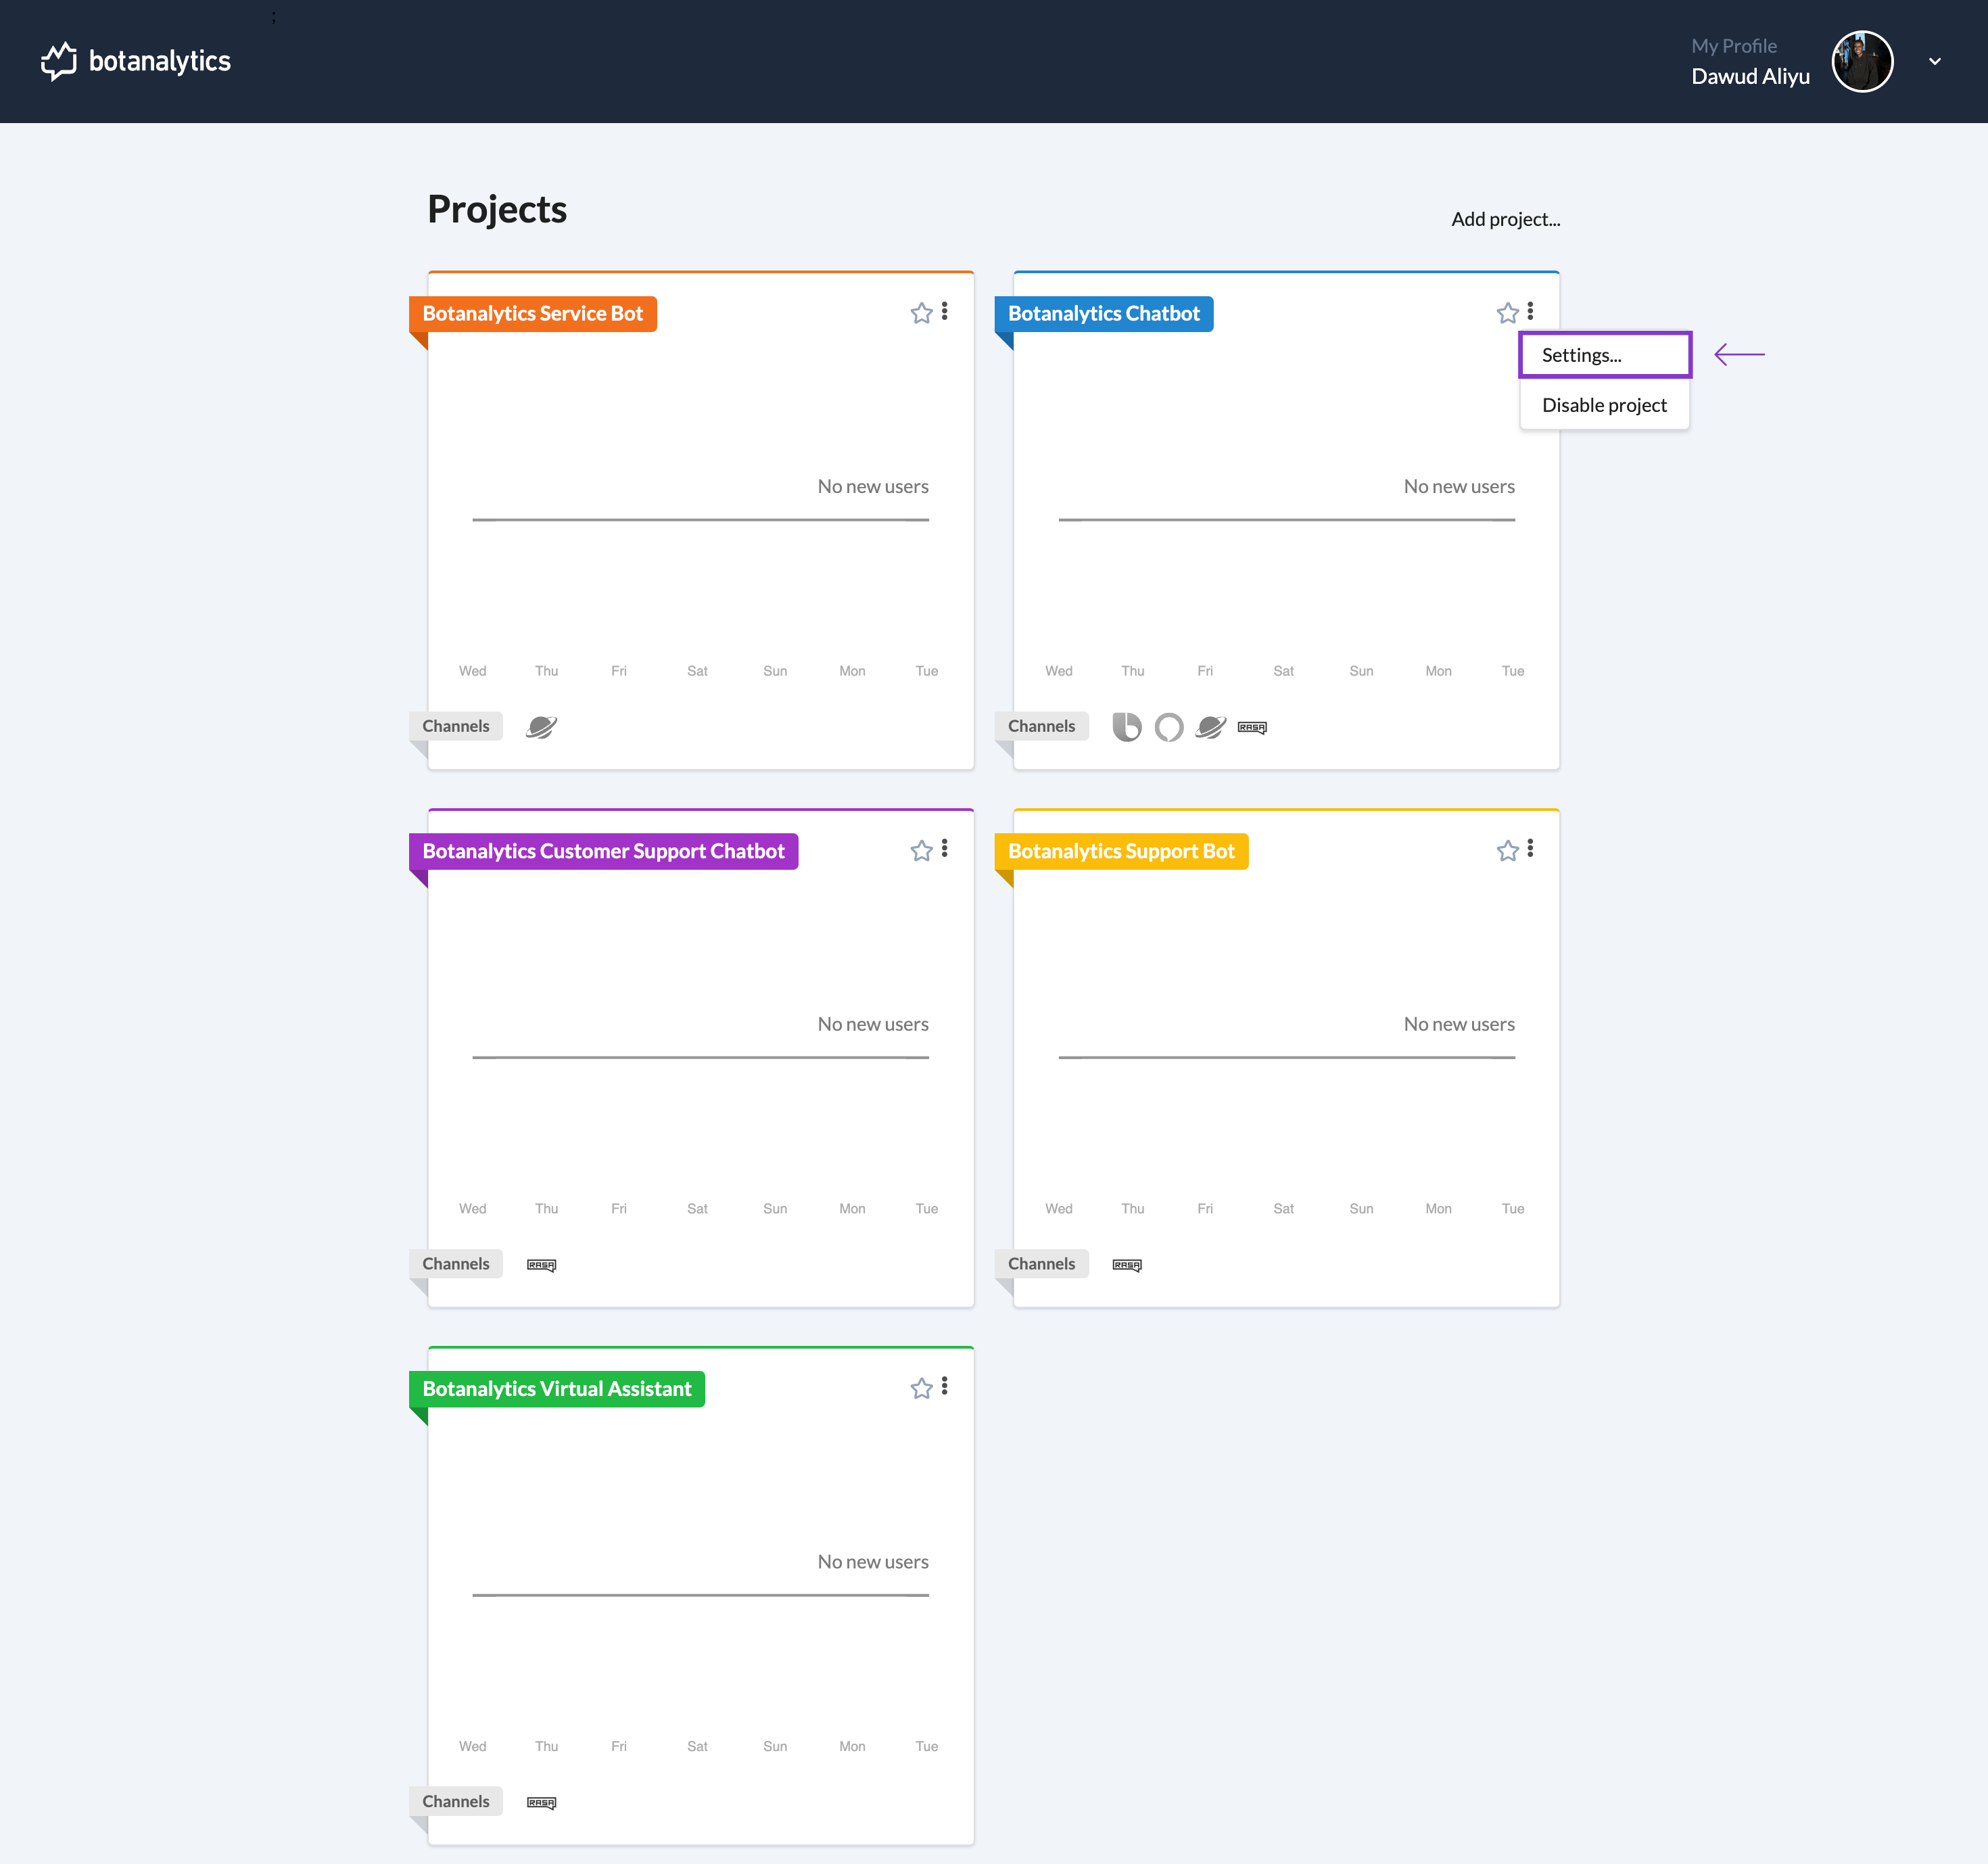
- From the drop-down menu, select "Settings."
Navigate to Channels
- In the settings window, you will see different sections, including "General" and "Channels."
- Click on "Channels" to manage your connected channels.
Connect New Channel
- Under the "Channels" section, click on the "Connect New Channel" button.

Choose Your Preferred Channel
- A new window will appear.
- Click on select channel to display a list of available channels.

- Select your preferred channel from the list.

Add Channel
- Then Click on 'Add Channel'

Channel Added and Displayed
- After selecting the channel, it will be displayed in the "Channels" window.


